Adding Courses to a Portal
A Portal allows you to add multiple memberships to a single page. The memberships on a Portal can be shown to all visitors, or only those who have access to those memberships. To create one, begin by going to the Portals area either by clicking the shortcut or the icon in the sidebar.
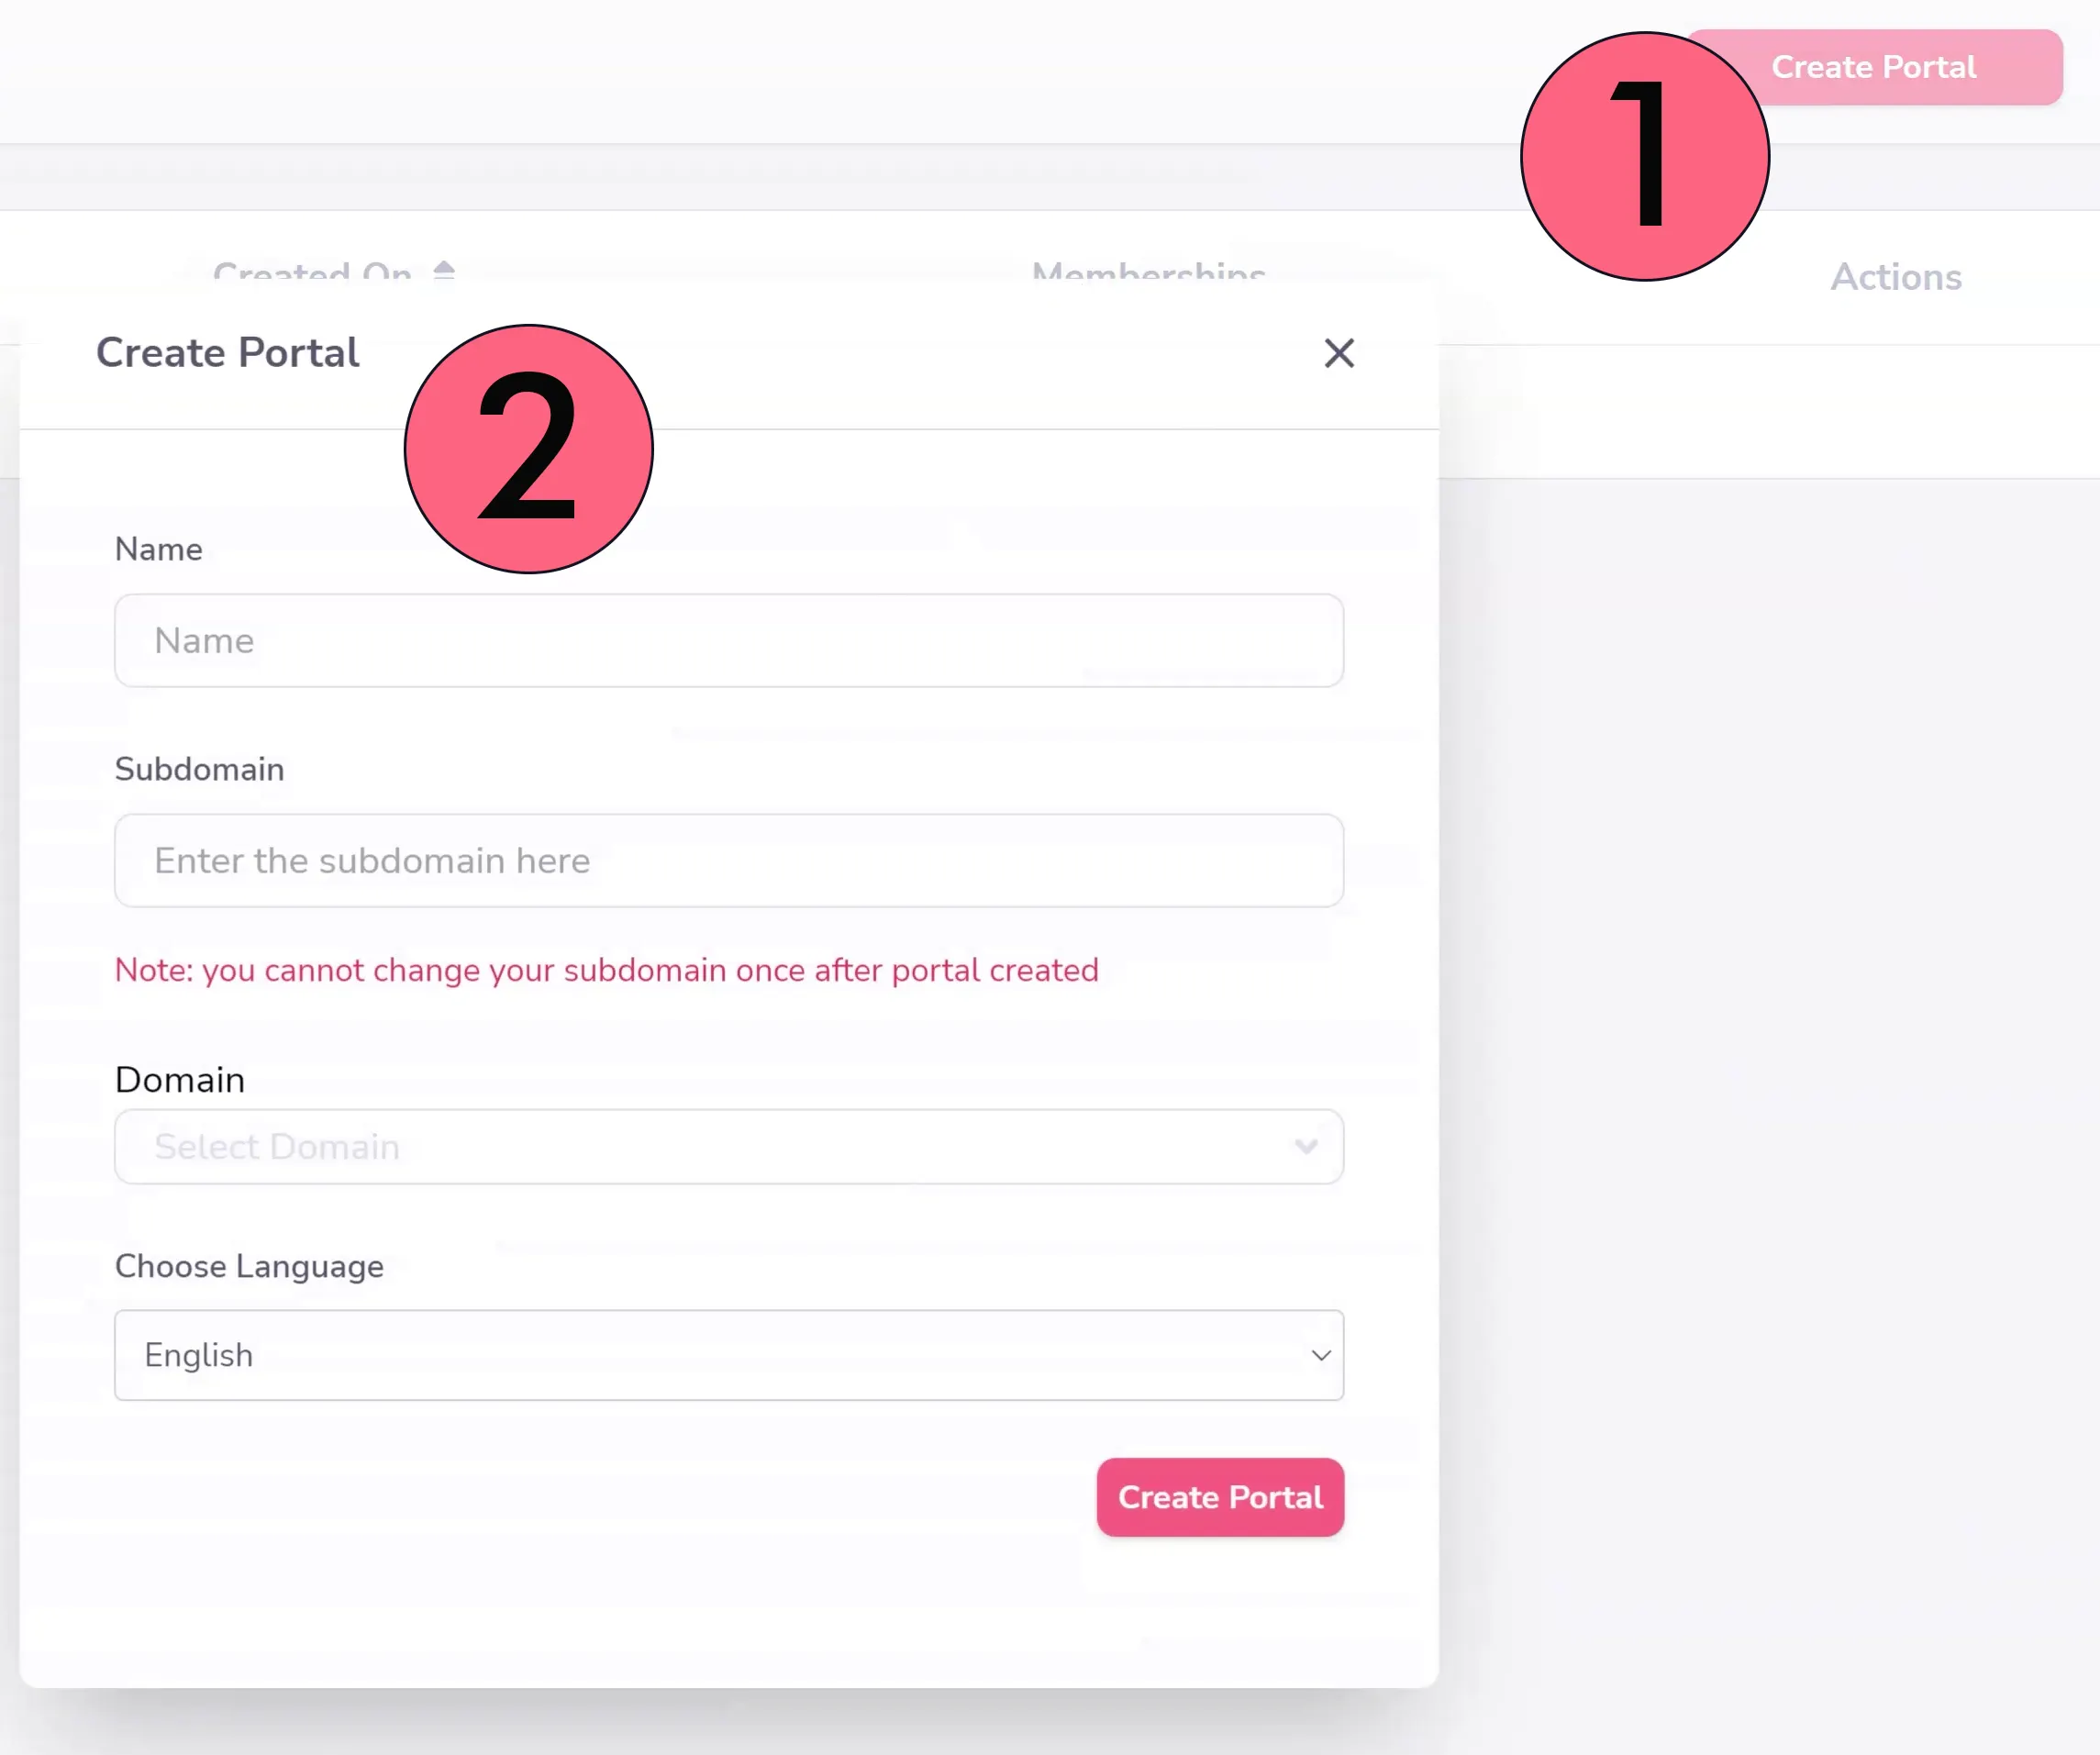
In the Portals area, click "Create Portal" (#1 below) and fill out the relevant information about your new portal (#2 below). You'll need to name it, create a subdomain, choose a domain to associate it with if you have one added for GrooveMember, and what language it will be displayed in.

Next you'll be brought through a setup wizard. The basic info is public facing details about your portal.

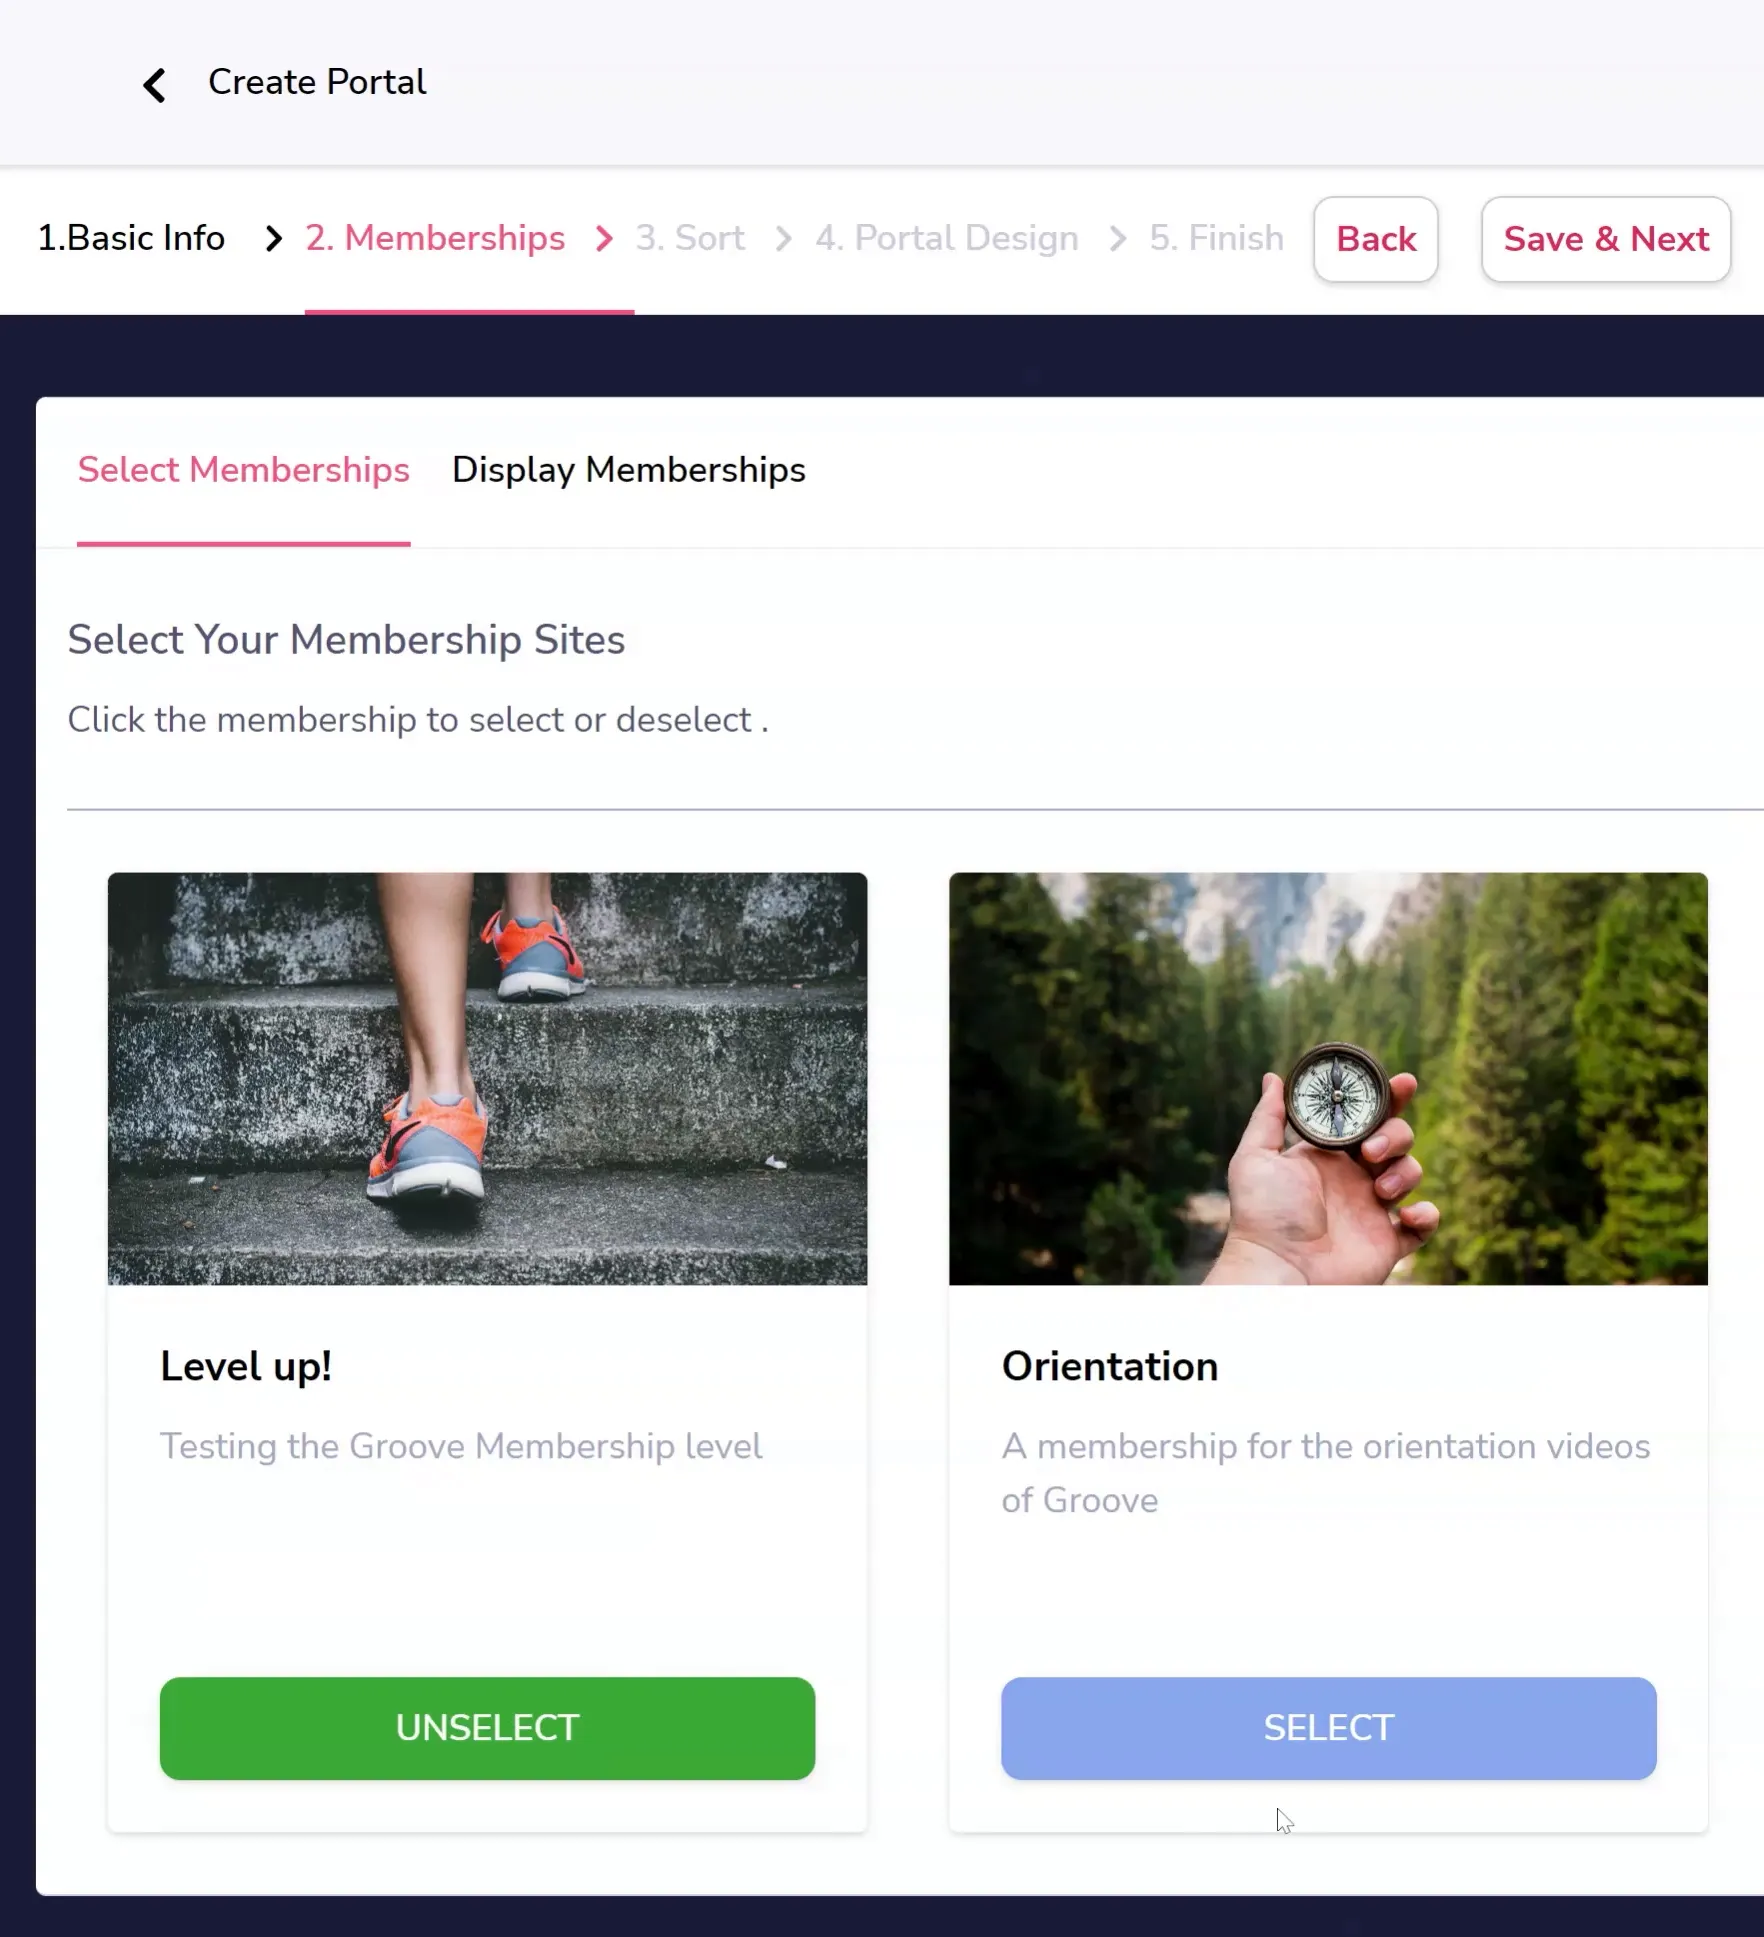
Memberships (shown below) is where you actually select what memberships to add to the portal.
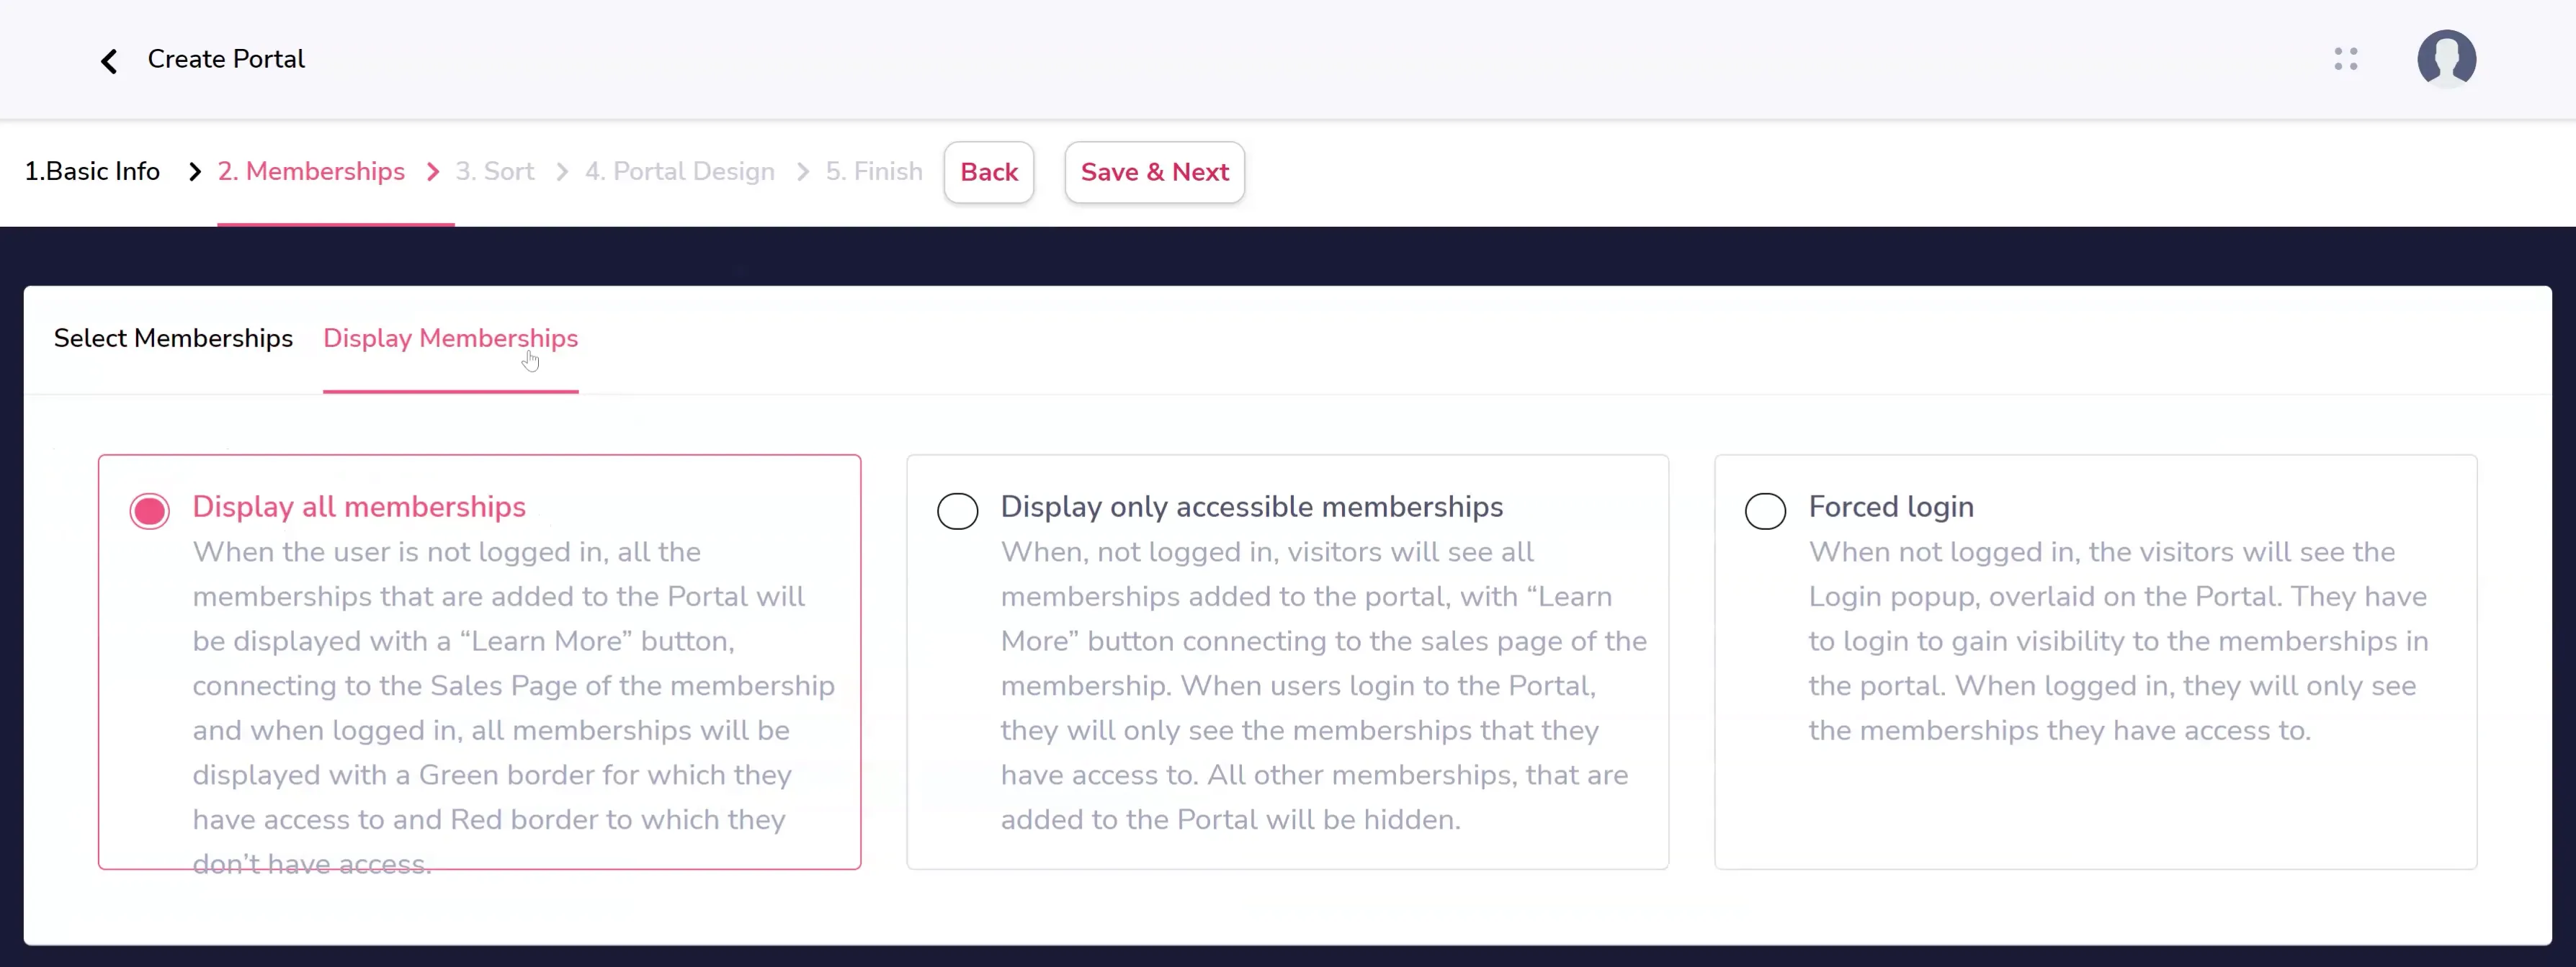
In the second tab, Display Memberships, you'll choose to whom those memberships should be displayed. There are descriptions for each of these options on the page (and the below screenshot).
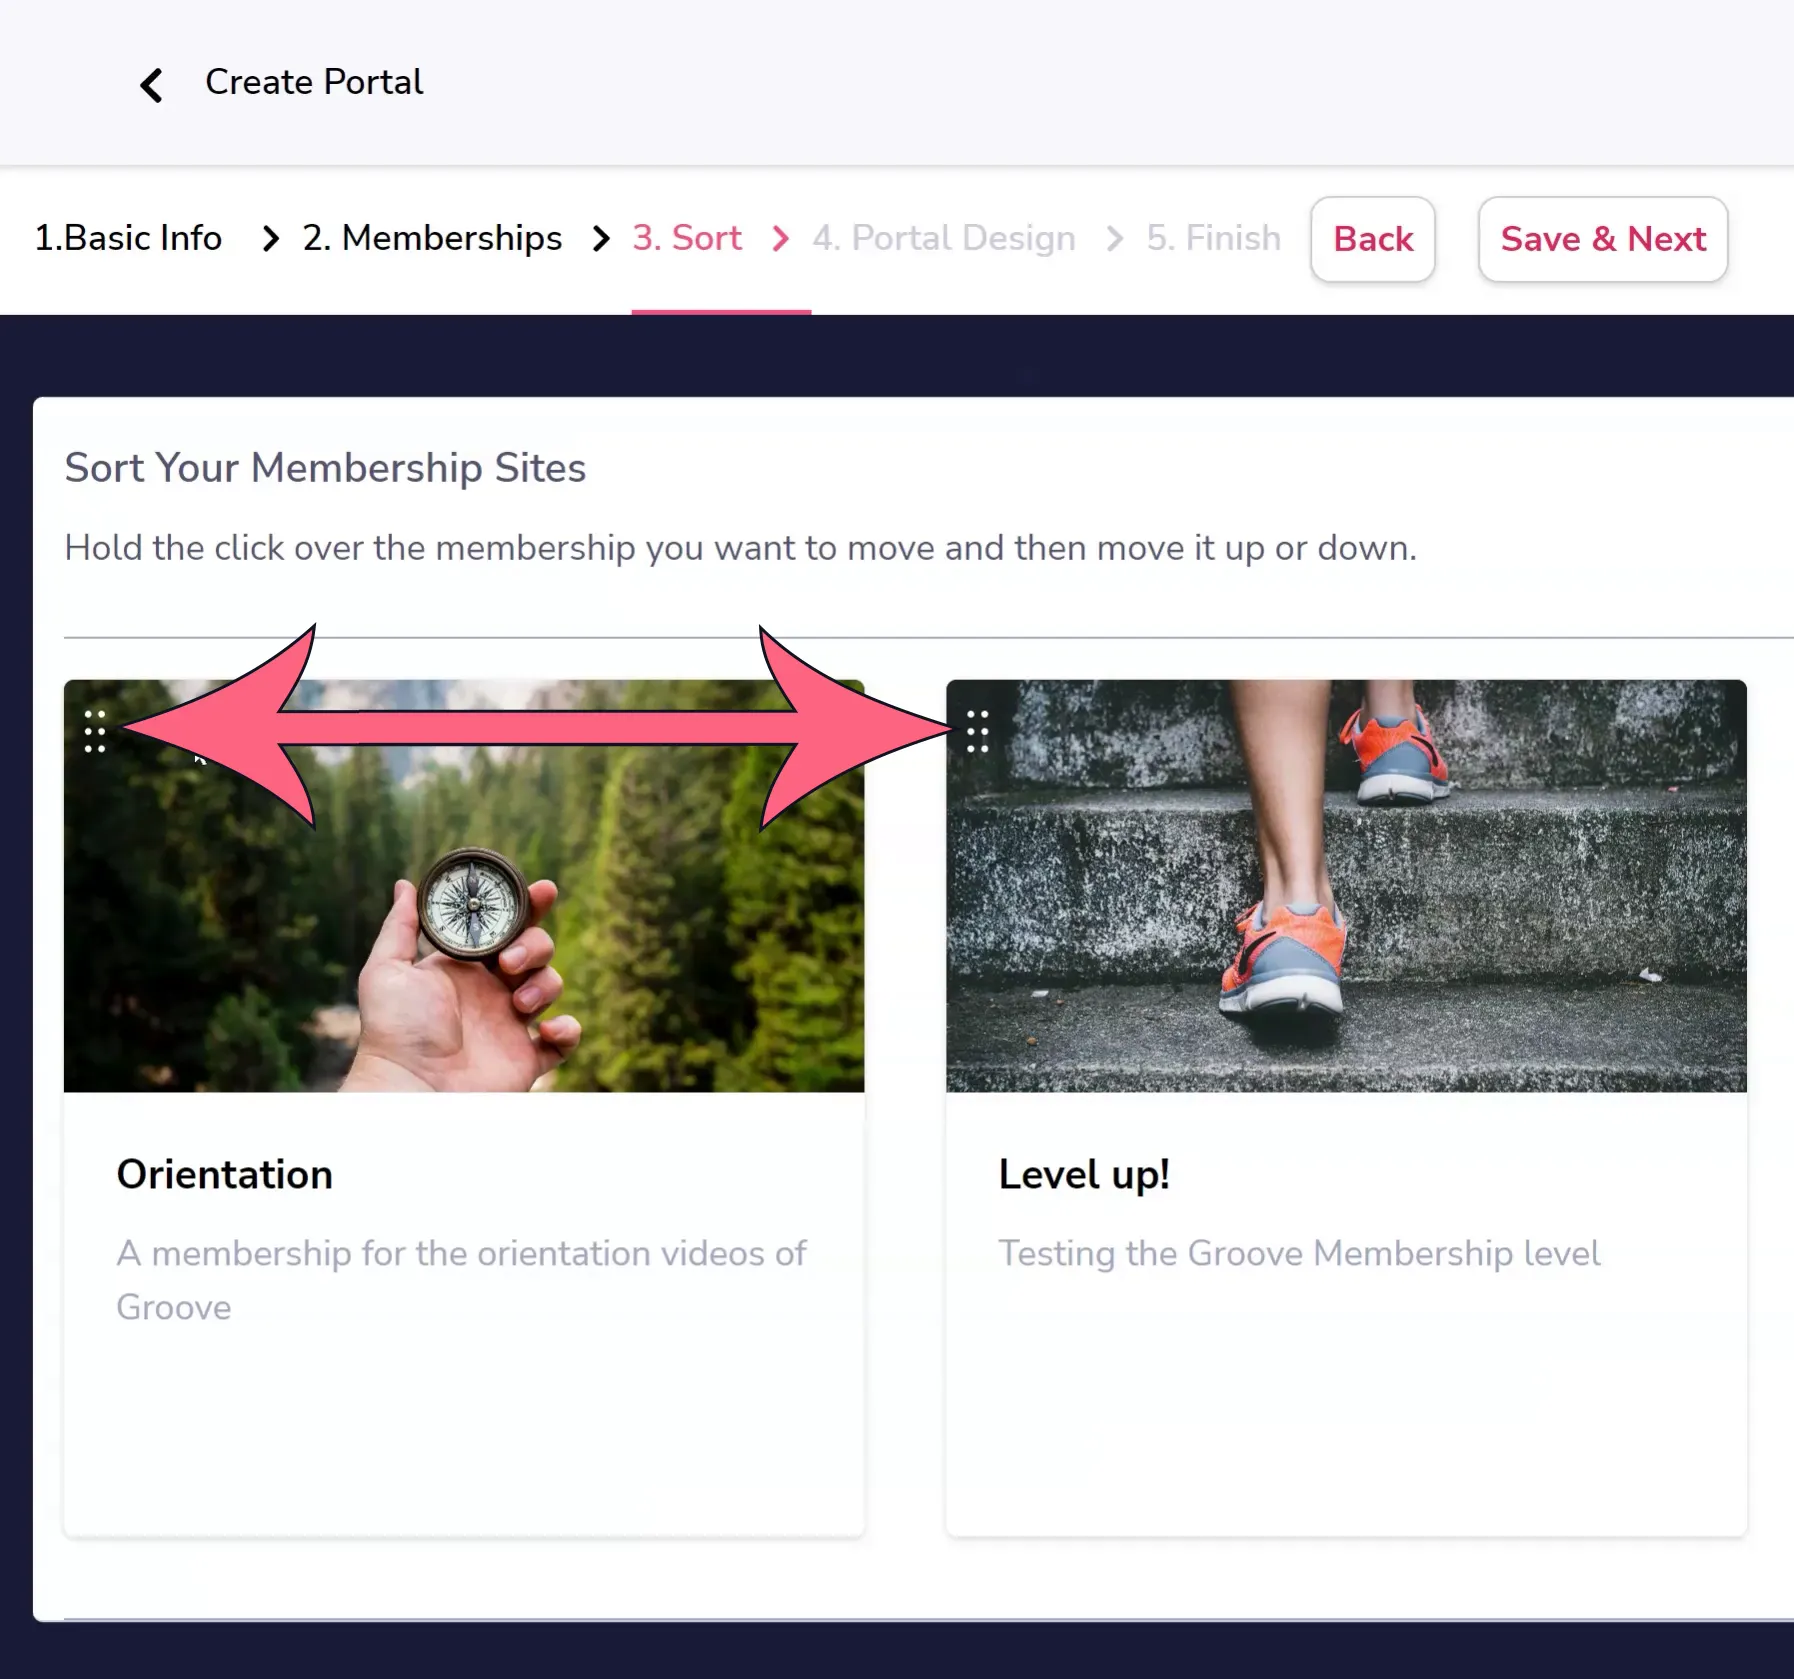
Next, under Sort, you can move the memberships around to the order you wish them to be displayed by clicking and dragging from the corner (shown below).
Finally, you will select a portal design template to use.
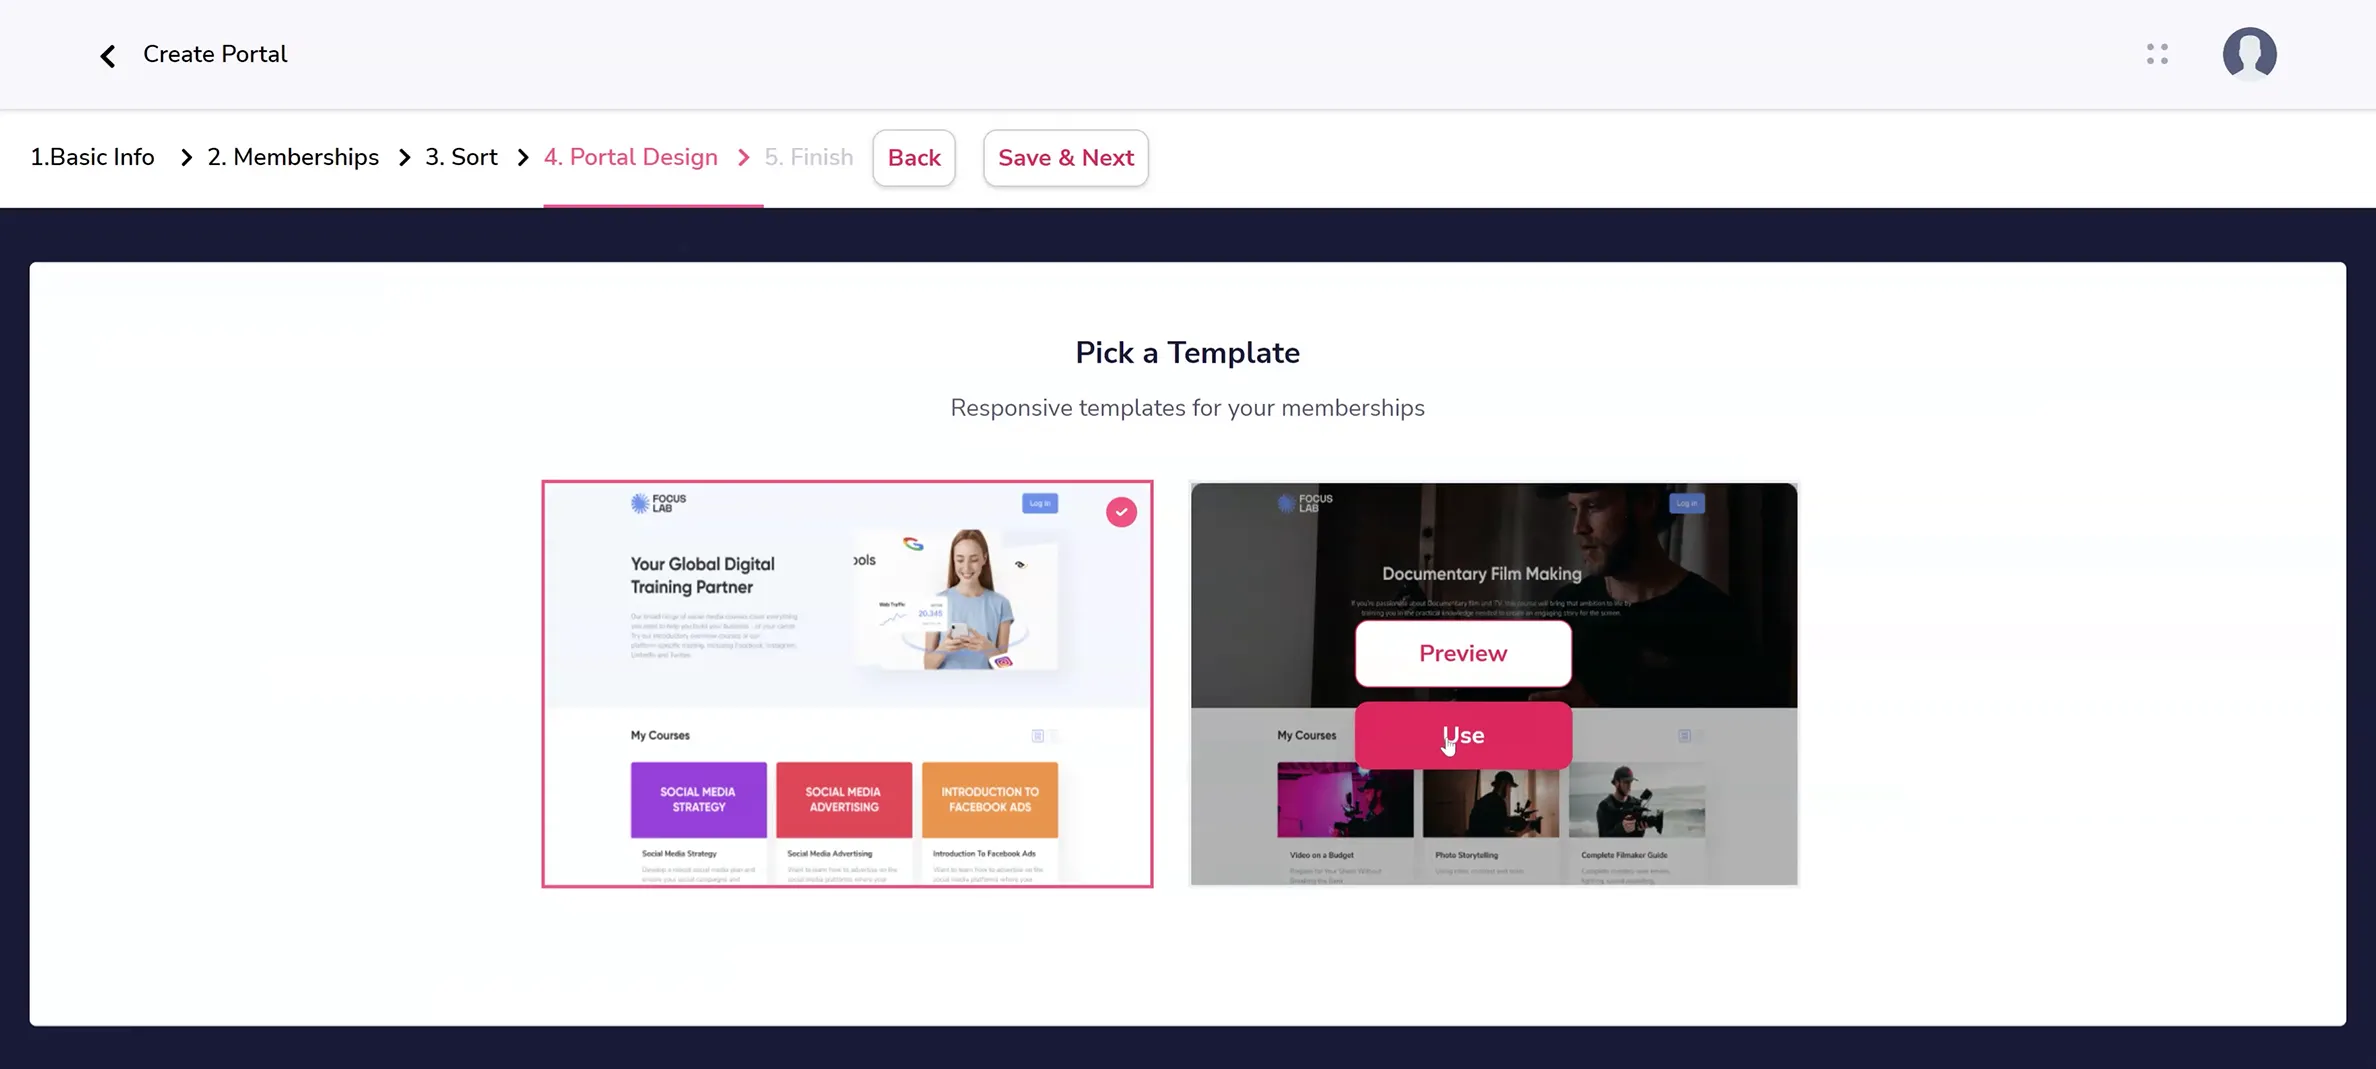
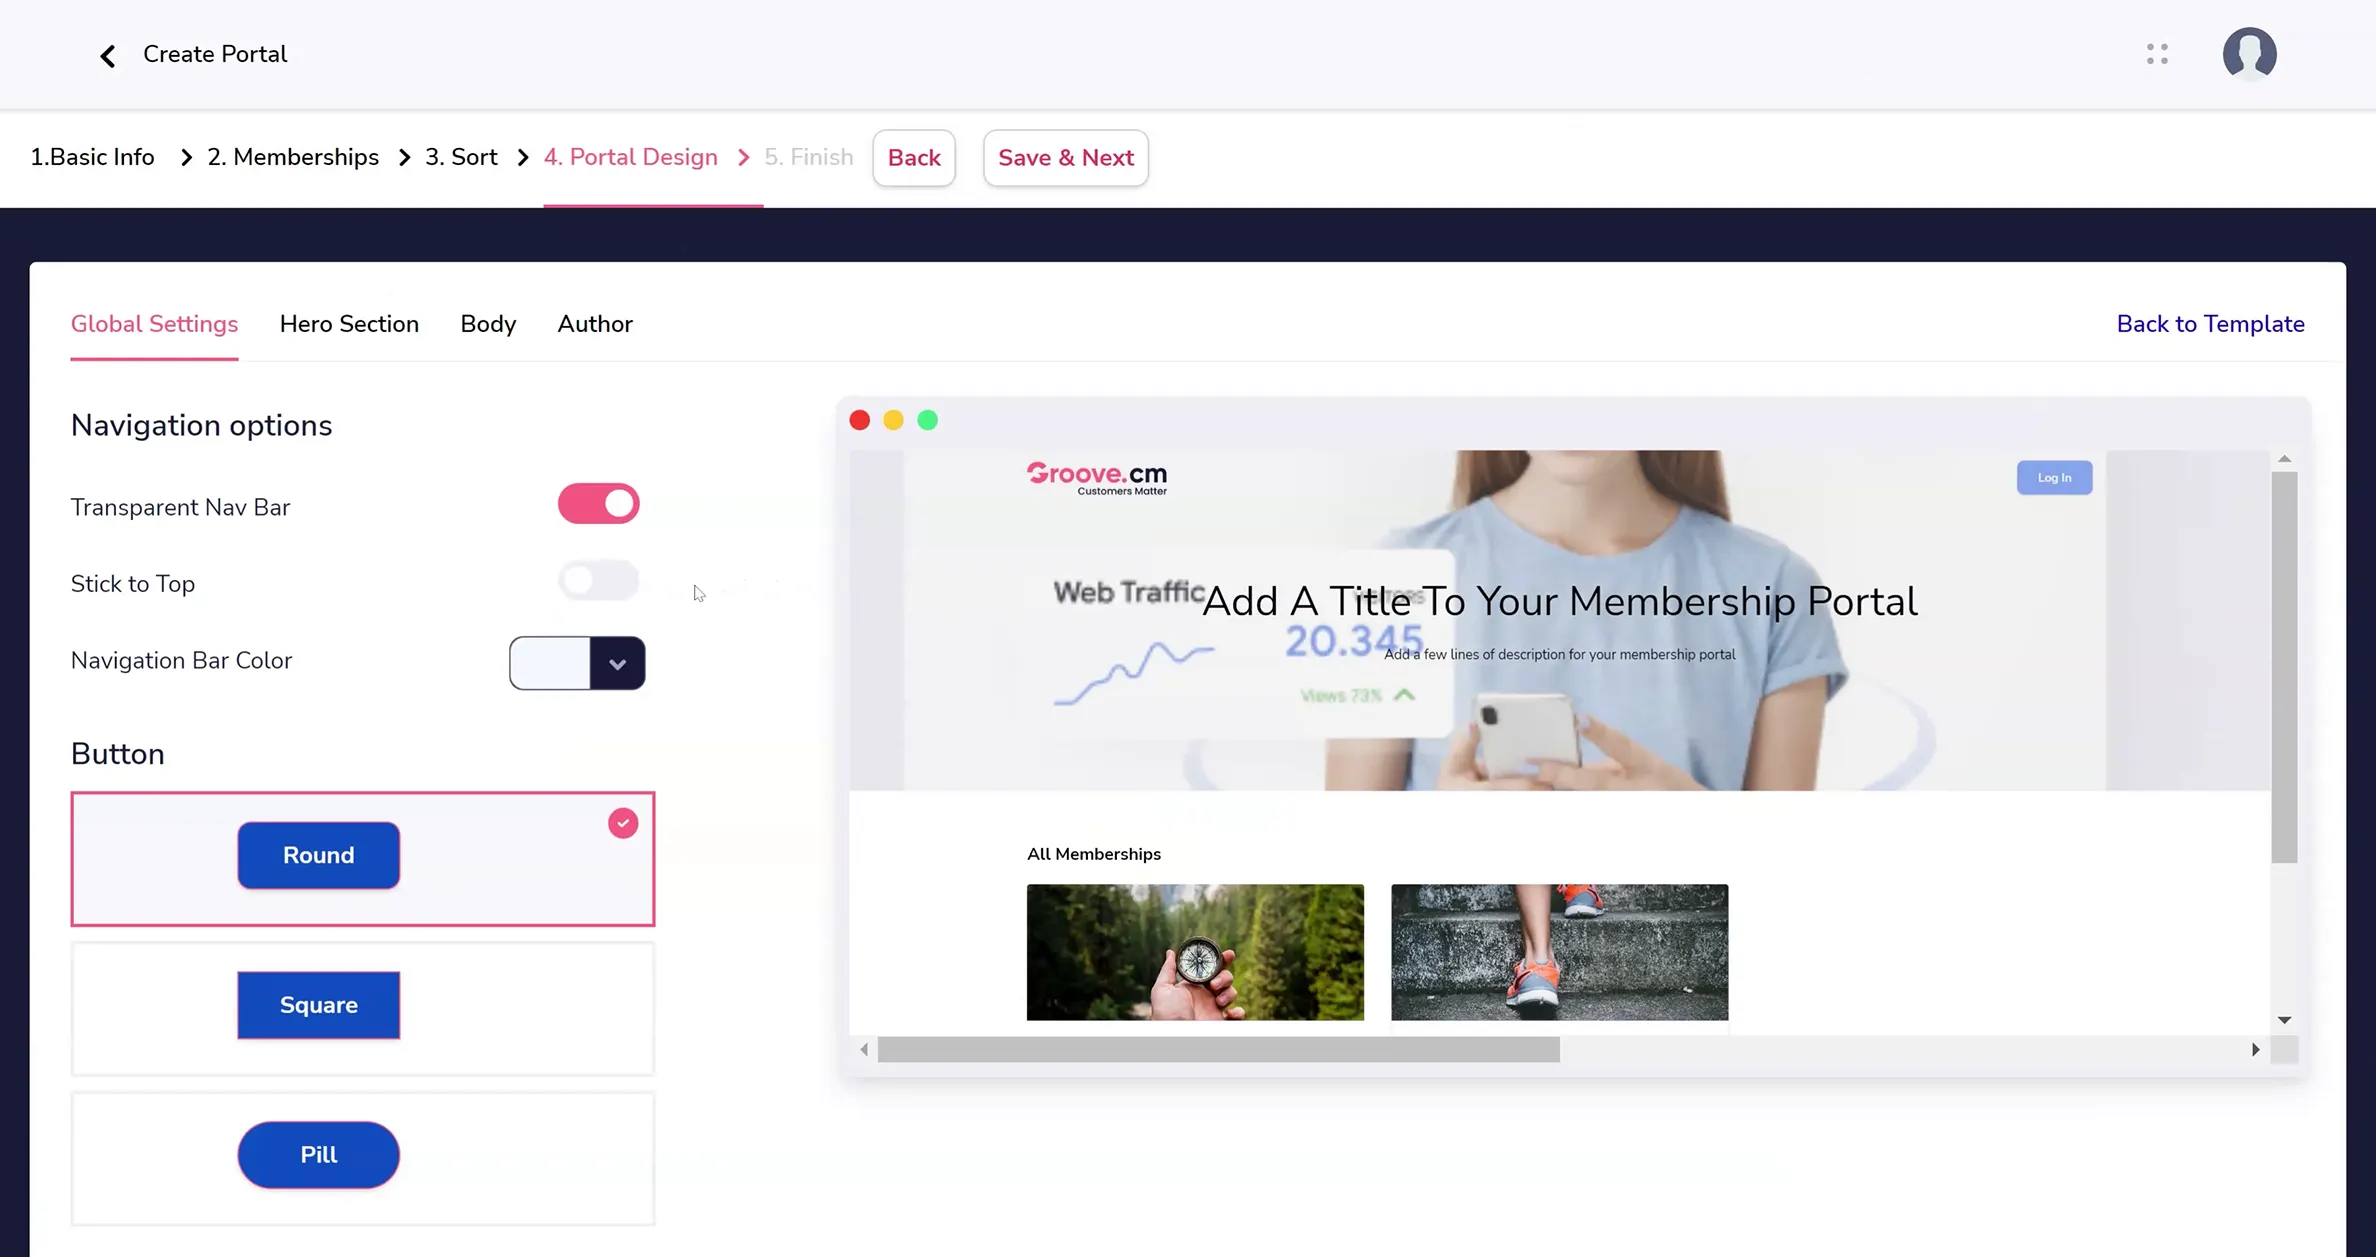
Once you choose a template, you'll be given the option to customize it to your needs including colors, shapes, and links to relevant pages.
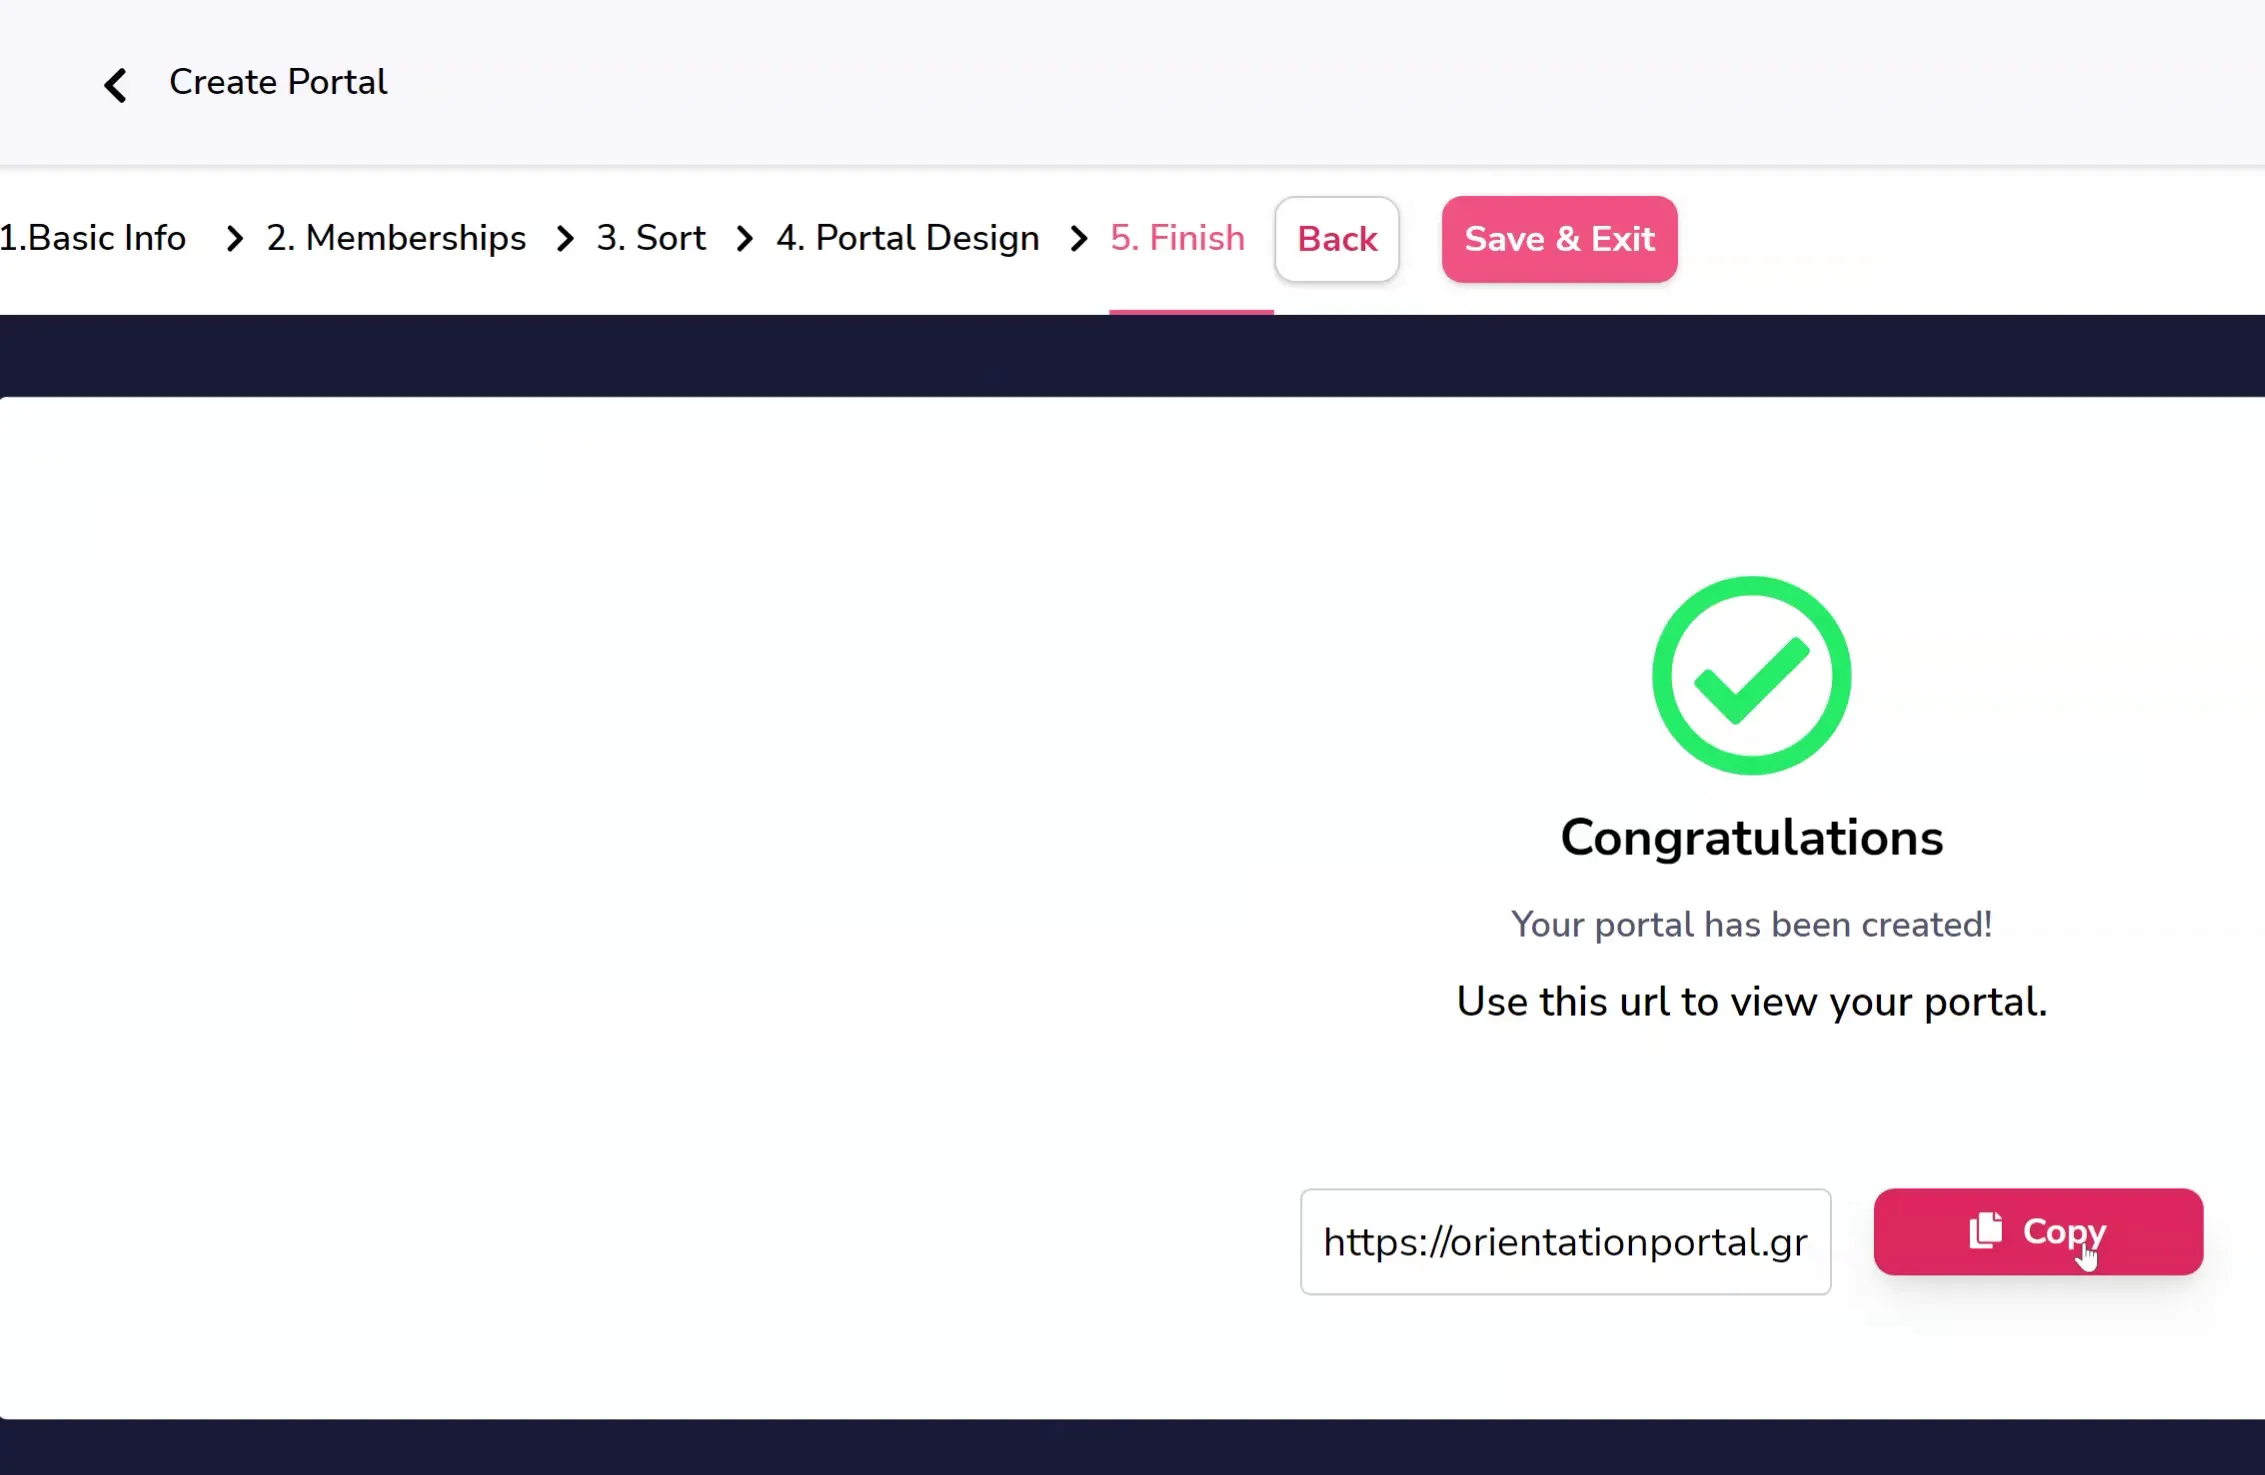
After this, your portal has been created! You can use the link (as shown below) to share your portal with others.