Groove.AI Setup
The premiere AI marketing platform has arrived: Groove.AI. And setup requires no coding on your part! Read on to learn the 3 main steps to using Groove.AI...
OpenAI Billing
Groove.AI uses API calls from OpenAI's ChatGPT. But billing for the API is in a different area from ChatGPT. Go to Platform.OpenAI.com and create an account.
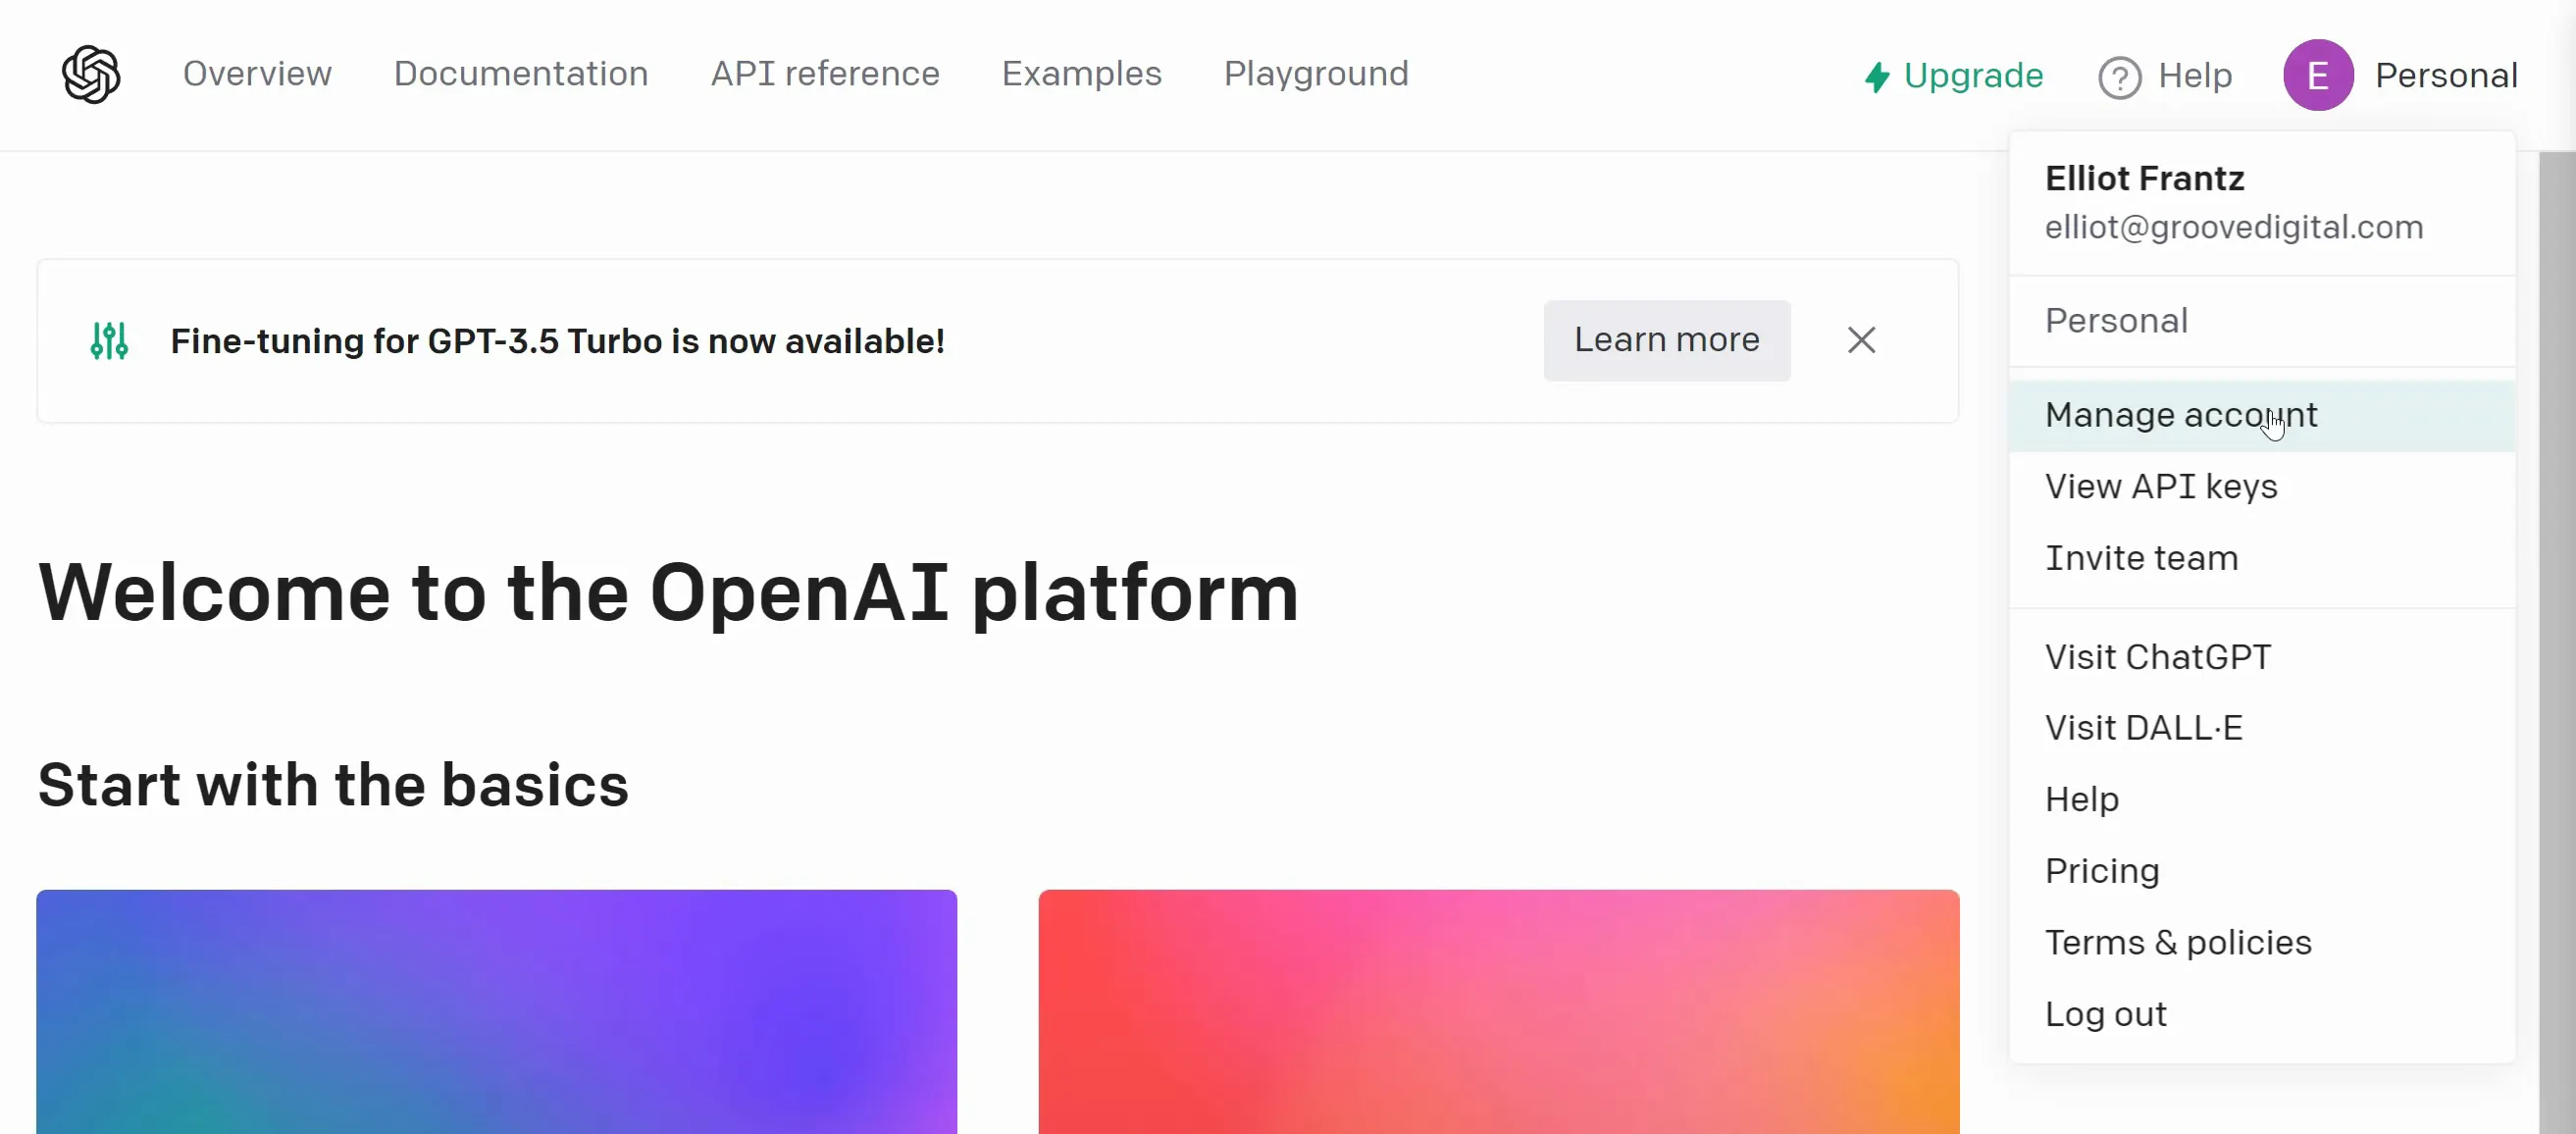
From the Platform dashboard (shown above), click your profile icon and select Manage Account. On the left side (shown below), click Billing and add a Payment Method.
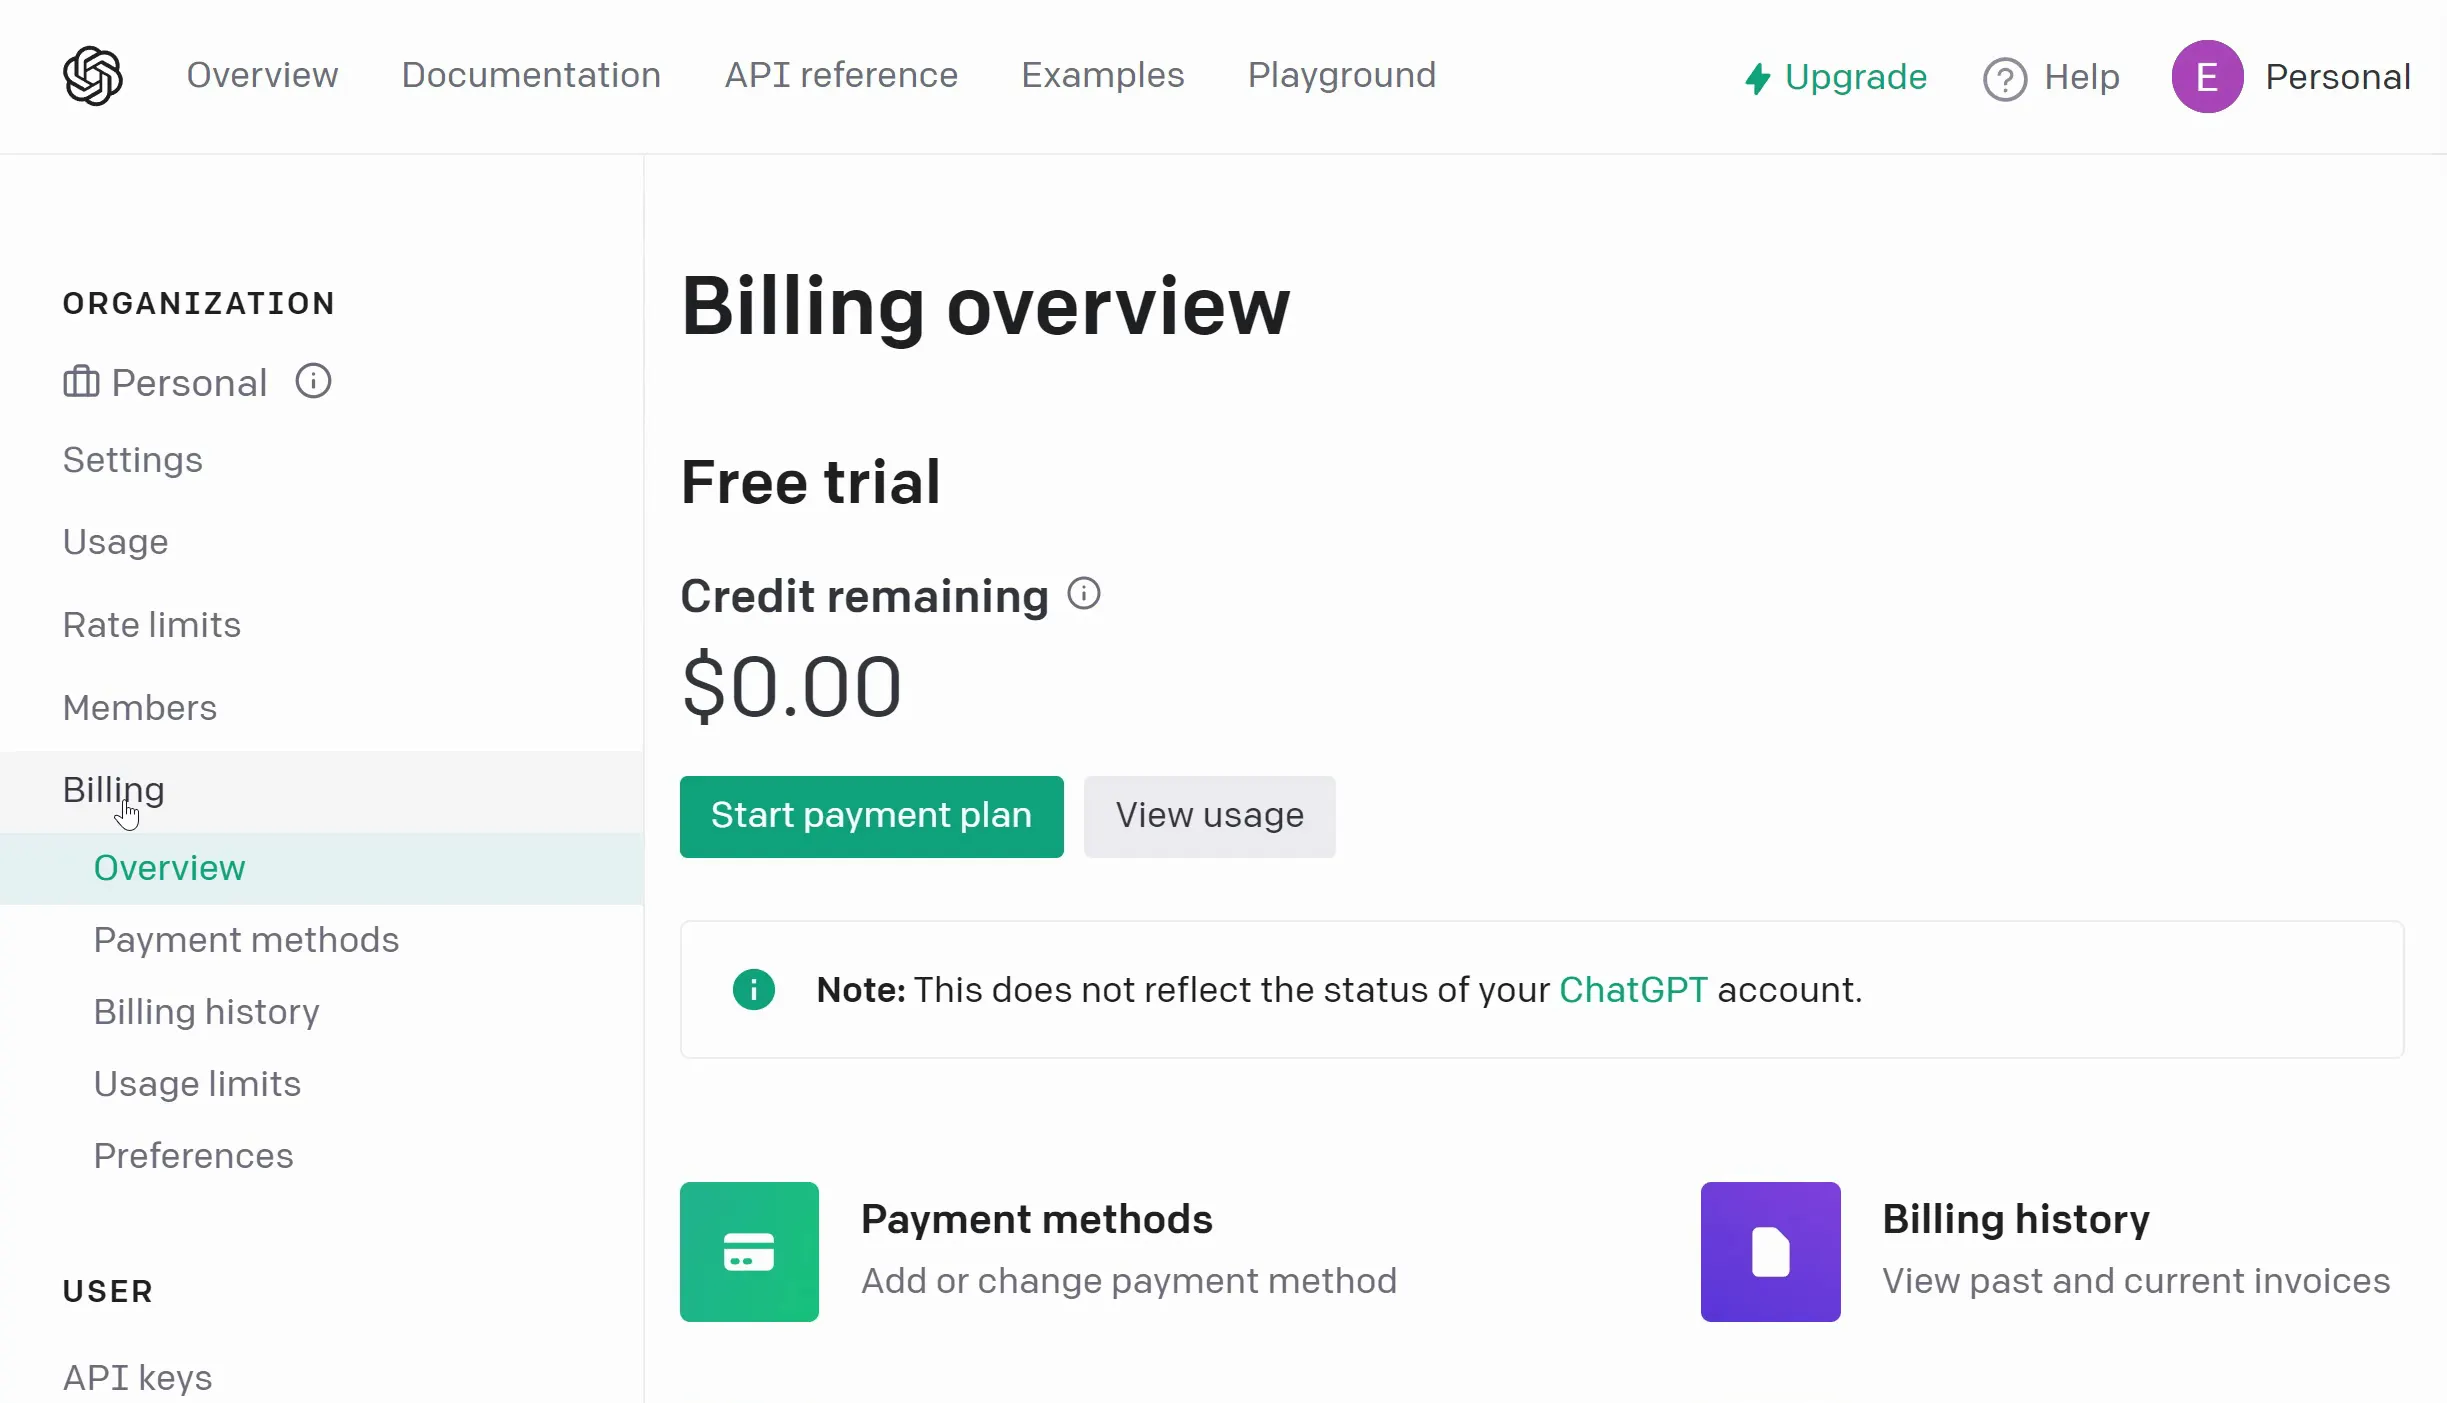
Since OpenAI's services often cost only fractions of a cent per use, their API system runs on a prepaid credit system. You need to load funds into your account in order to use the API (as shown below).
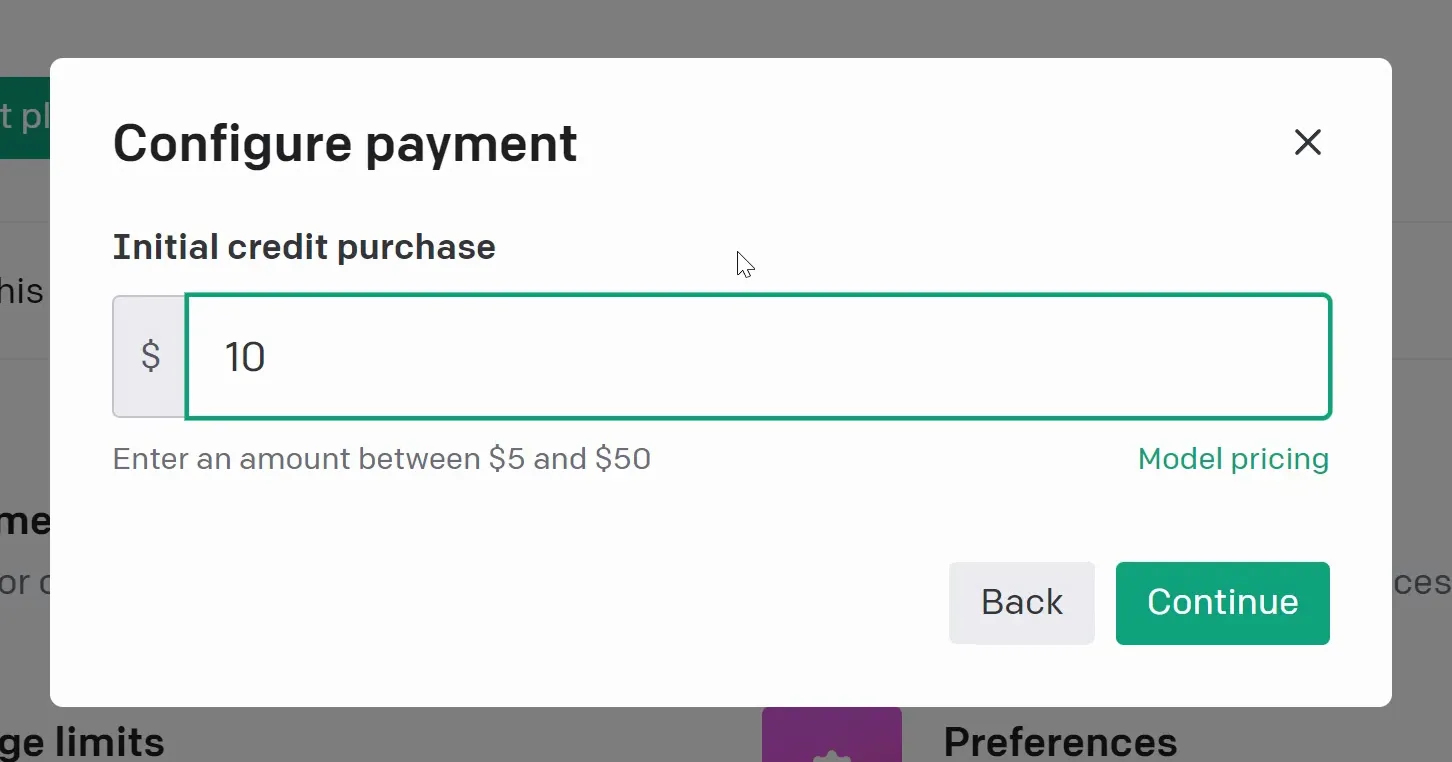
Add funds into your account and you will have access to use the API.
Be sure to keep an eye on your credit balance so you don't run into any issues resulting from a lack of funds. Luckily this takes time to happen!
Creating an AI Service
Inside your Groove.AI account for the first time, you'll see a banner (as shown below) asking you to create a New AI Service. This is where you will actually connect OpenAI to your Groove.AI account, so we highly recommend you begin here before doing anything else in Groove.AI.

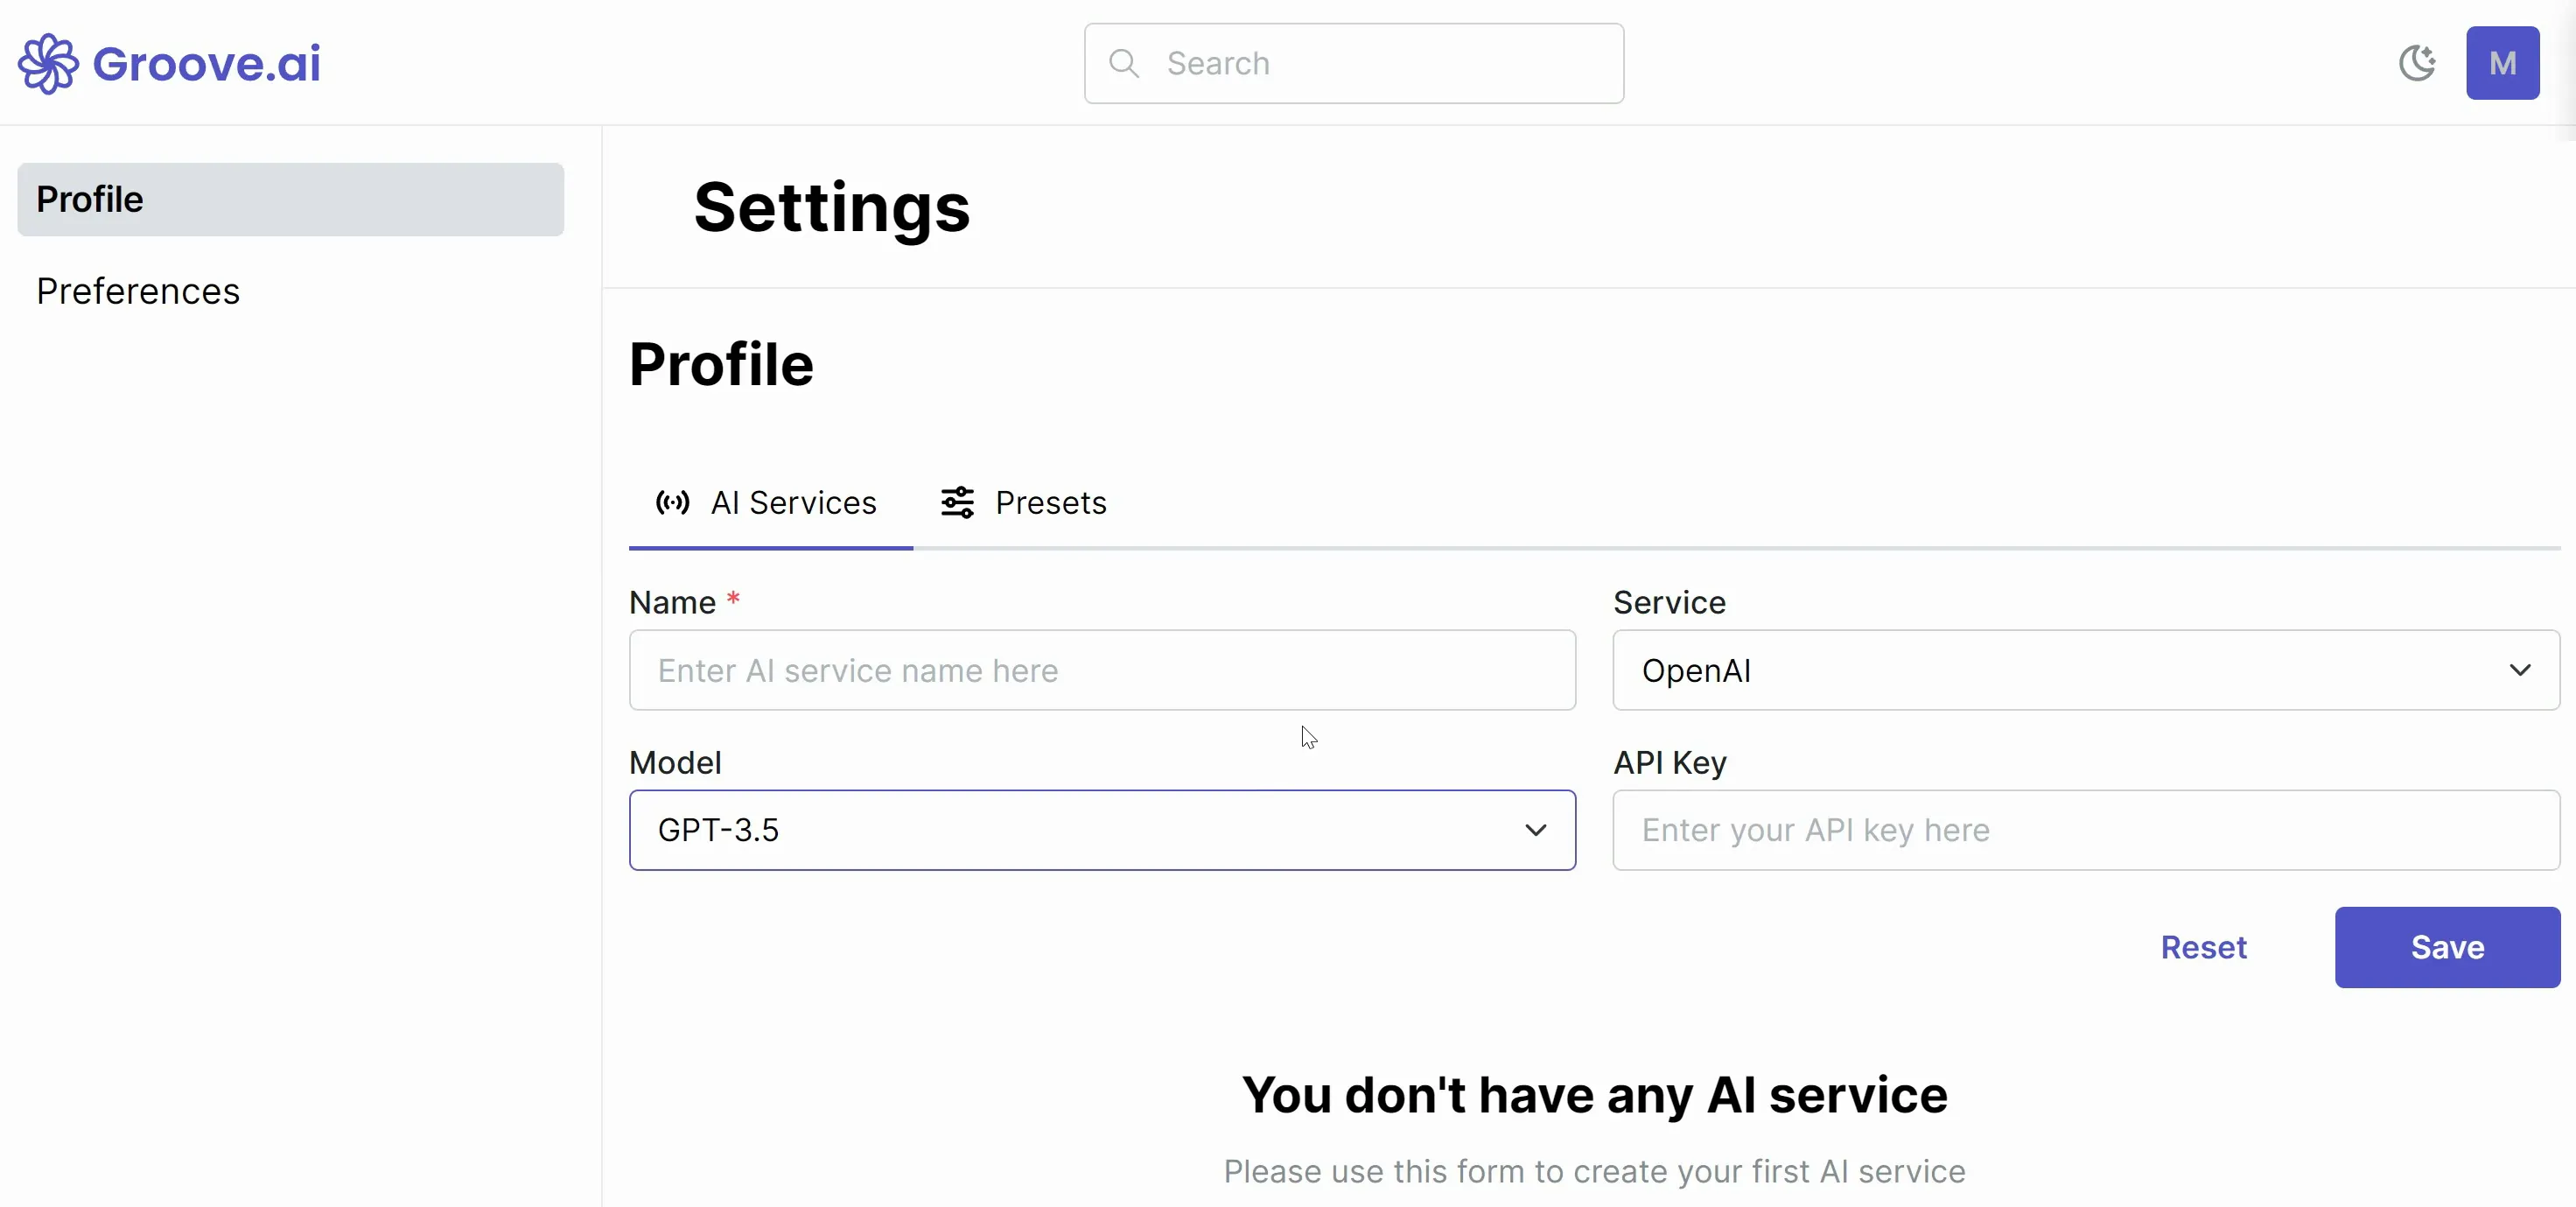
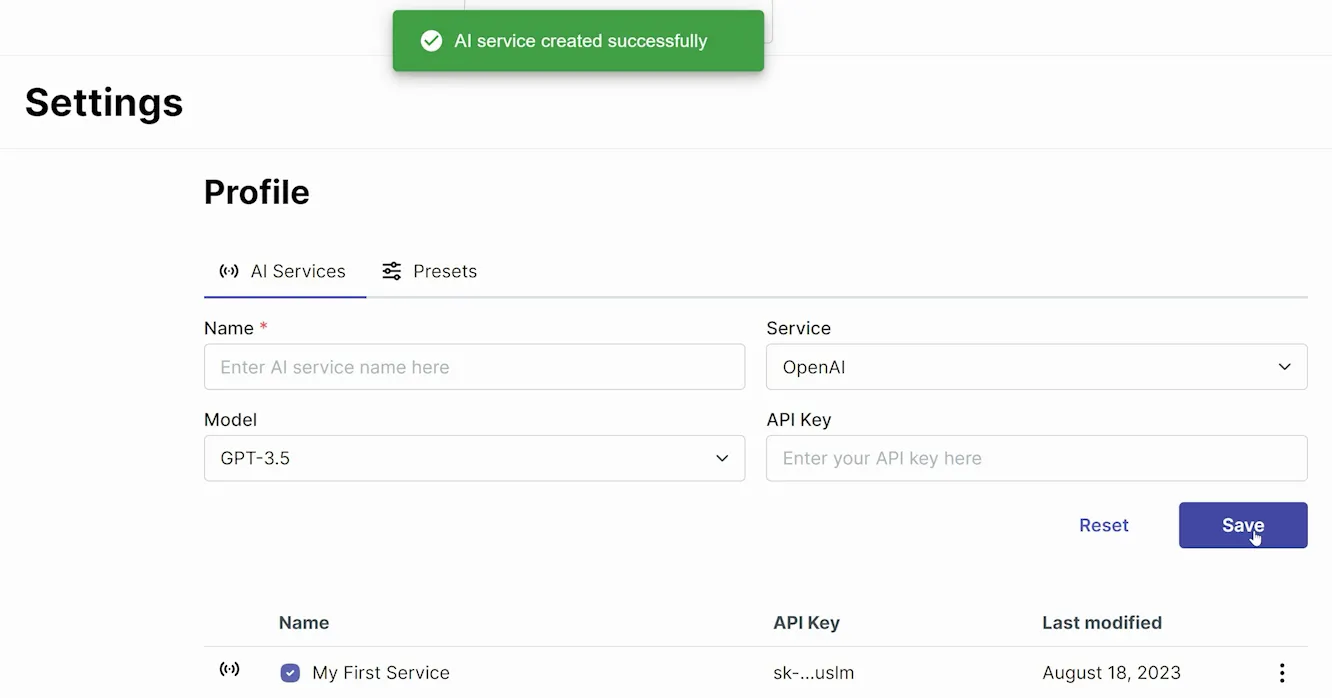
You will need to add four things (as shown below):
- Name - This is for your reference. You might add multiple versions of ChatGPT, and differentiating them this way could be helpful.
- Service - Here you will choose which LLM service you are using.
- Model - While we recommend GPT4, most accounts will only have access to GPT3.5 initially.
- API Key - This is found in your OpenAI Platform account (created earlier above).
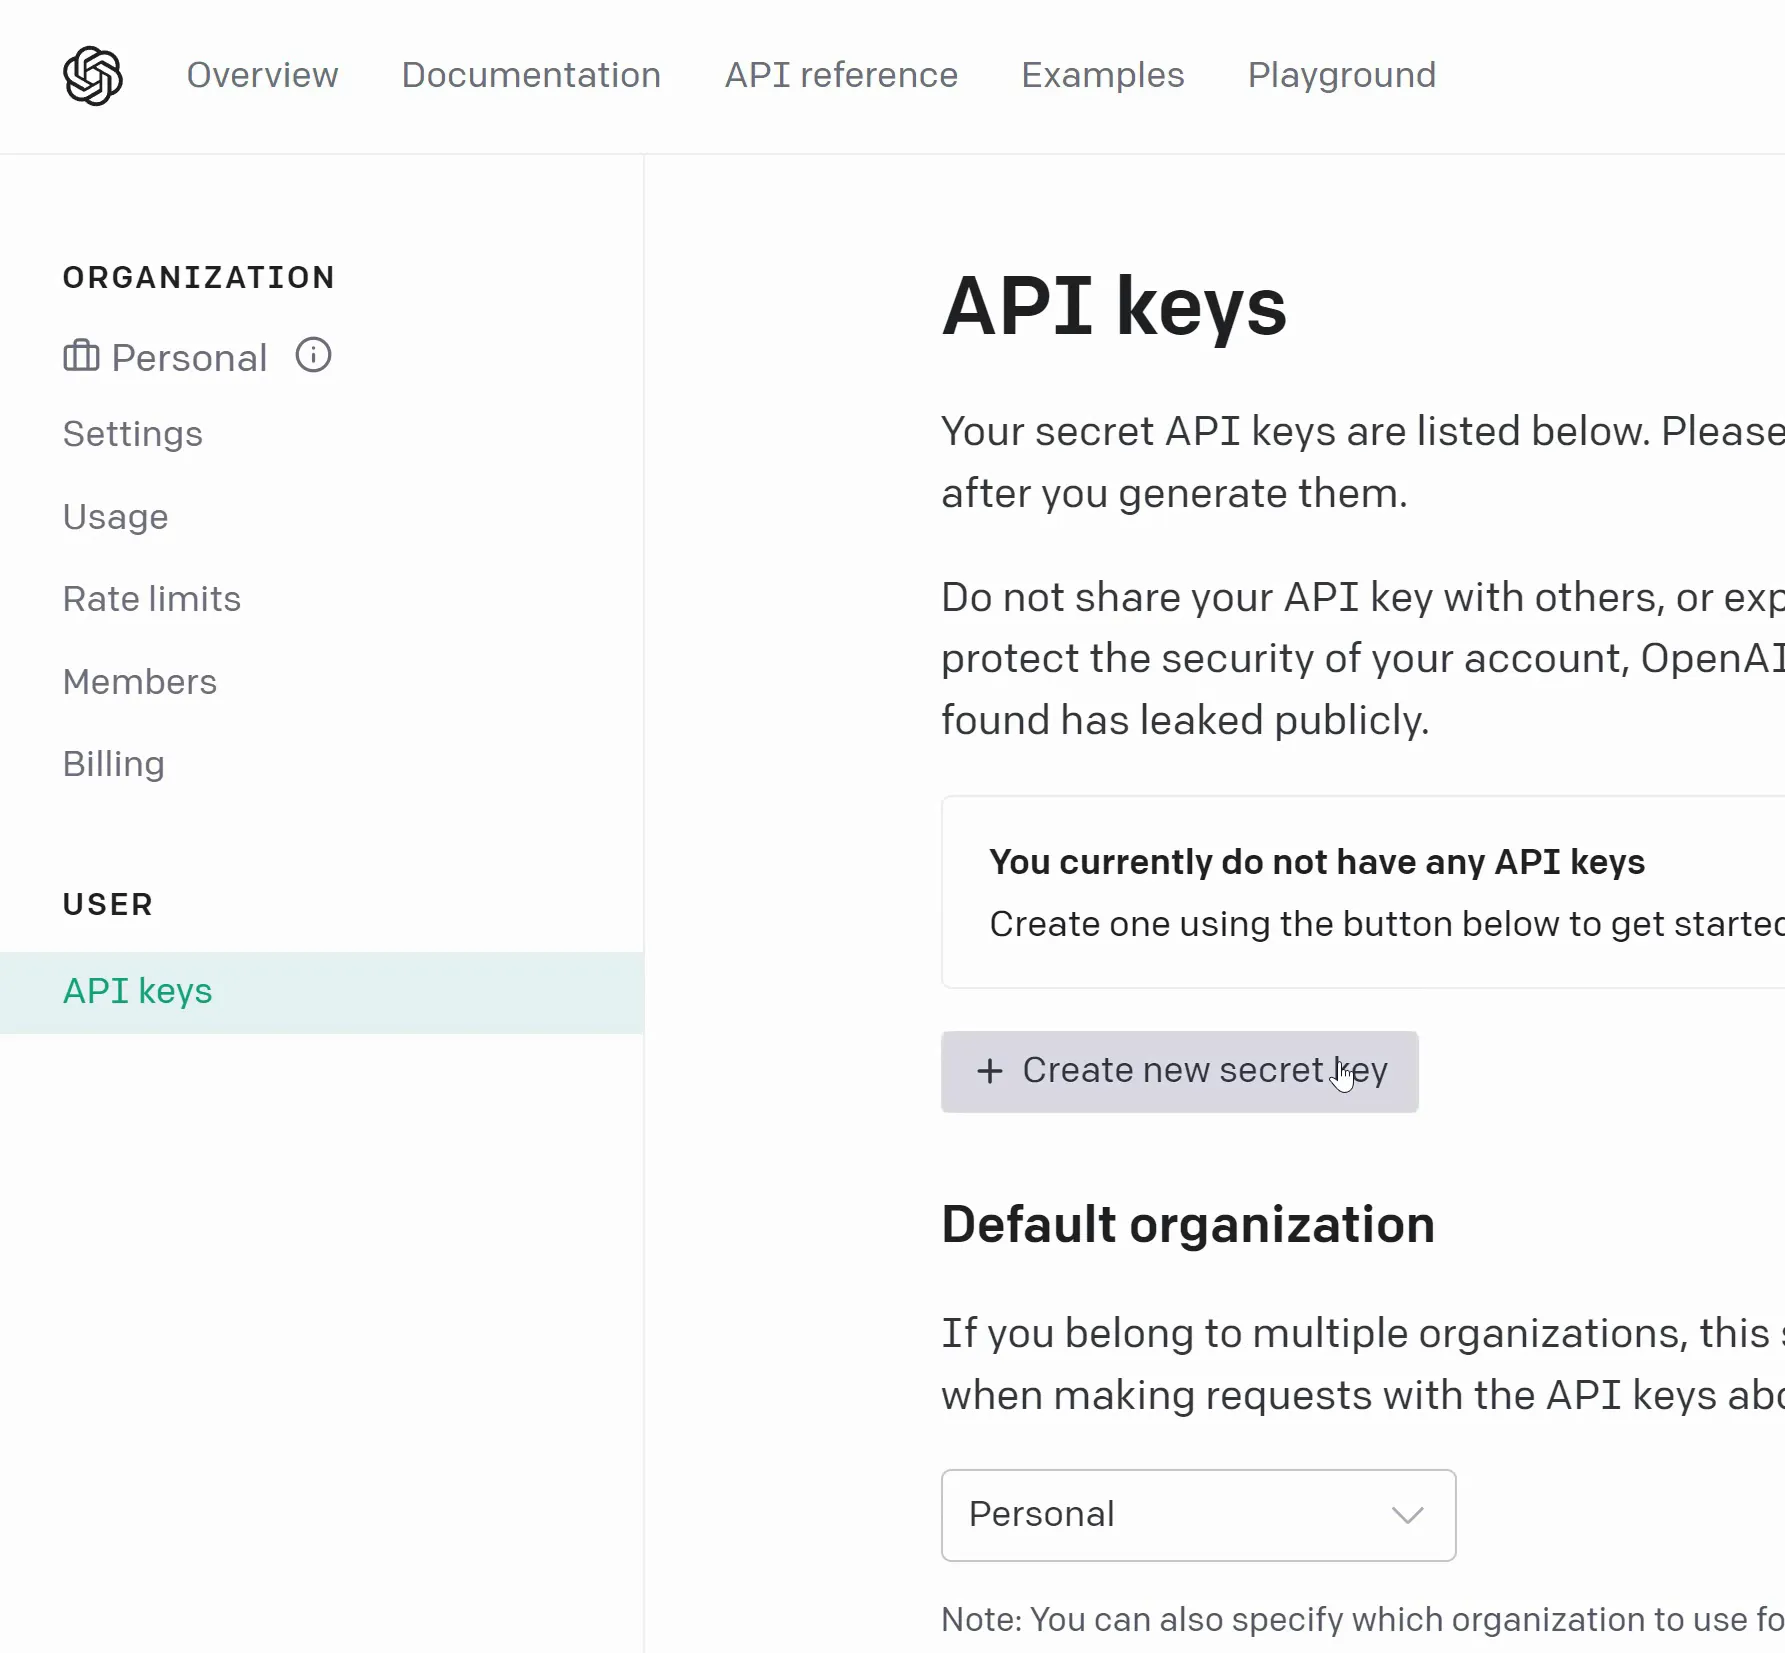
To find your OpenAI API Key, click your profile icon and select View API Keys (as shown below).

Here click "+ Create New Secret Key" (as shown below).
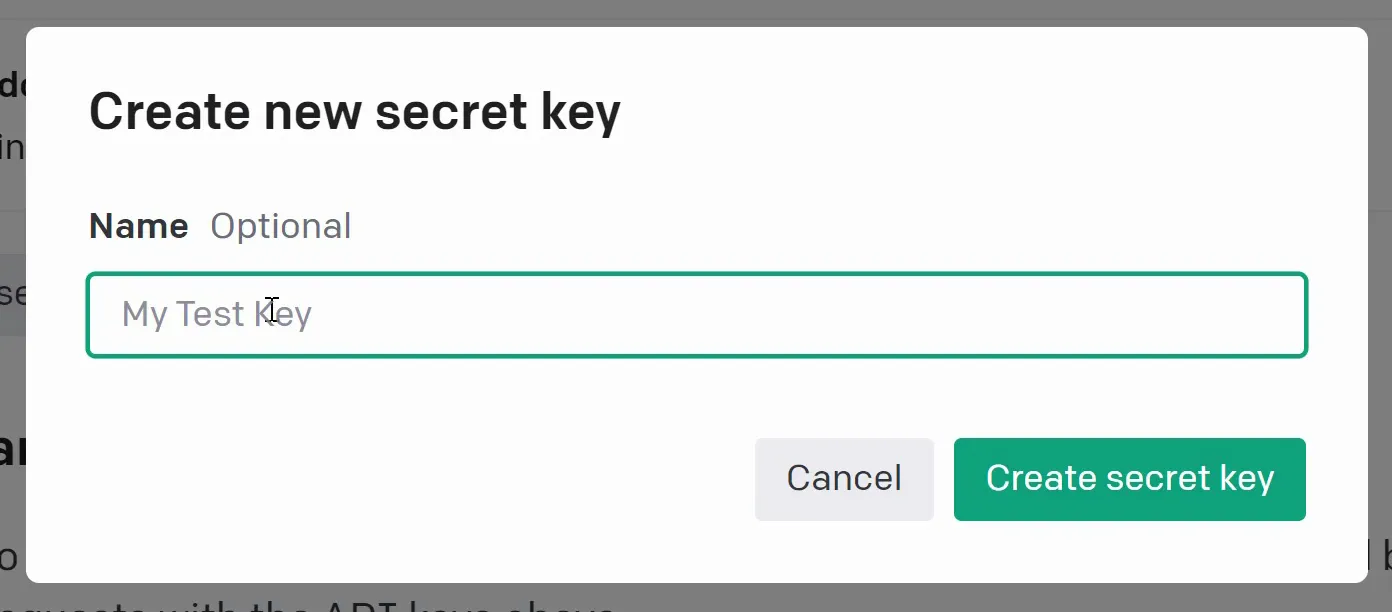
You can name the API Key if you wish (as shown below). Again, if you are creating multiple keys, a name could be helpful for you to organize them.
Once your key is created, it will only be shown to you once (as shown below) so copy it immediately.
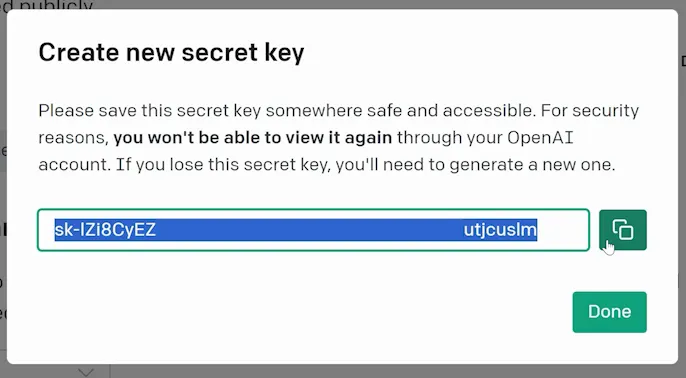
Bring the key back to Groove.AI and enter it into the final field before saving (as shown below). Your OpenAI account is now integrated!
Creating Presets
Presets are a great way to quickly set your tone and style of writing. In your settings, under the Presets tab, you can create as many as you'd like. There are 7 options to add (as shown below), but only the first two are required: Act like and Persona/Style.
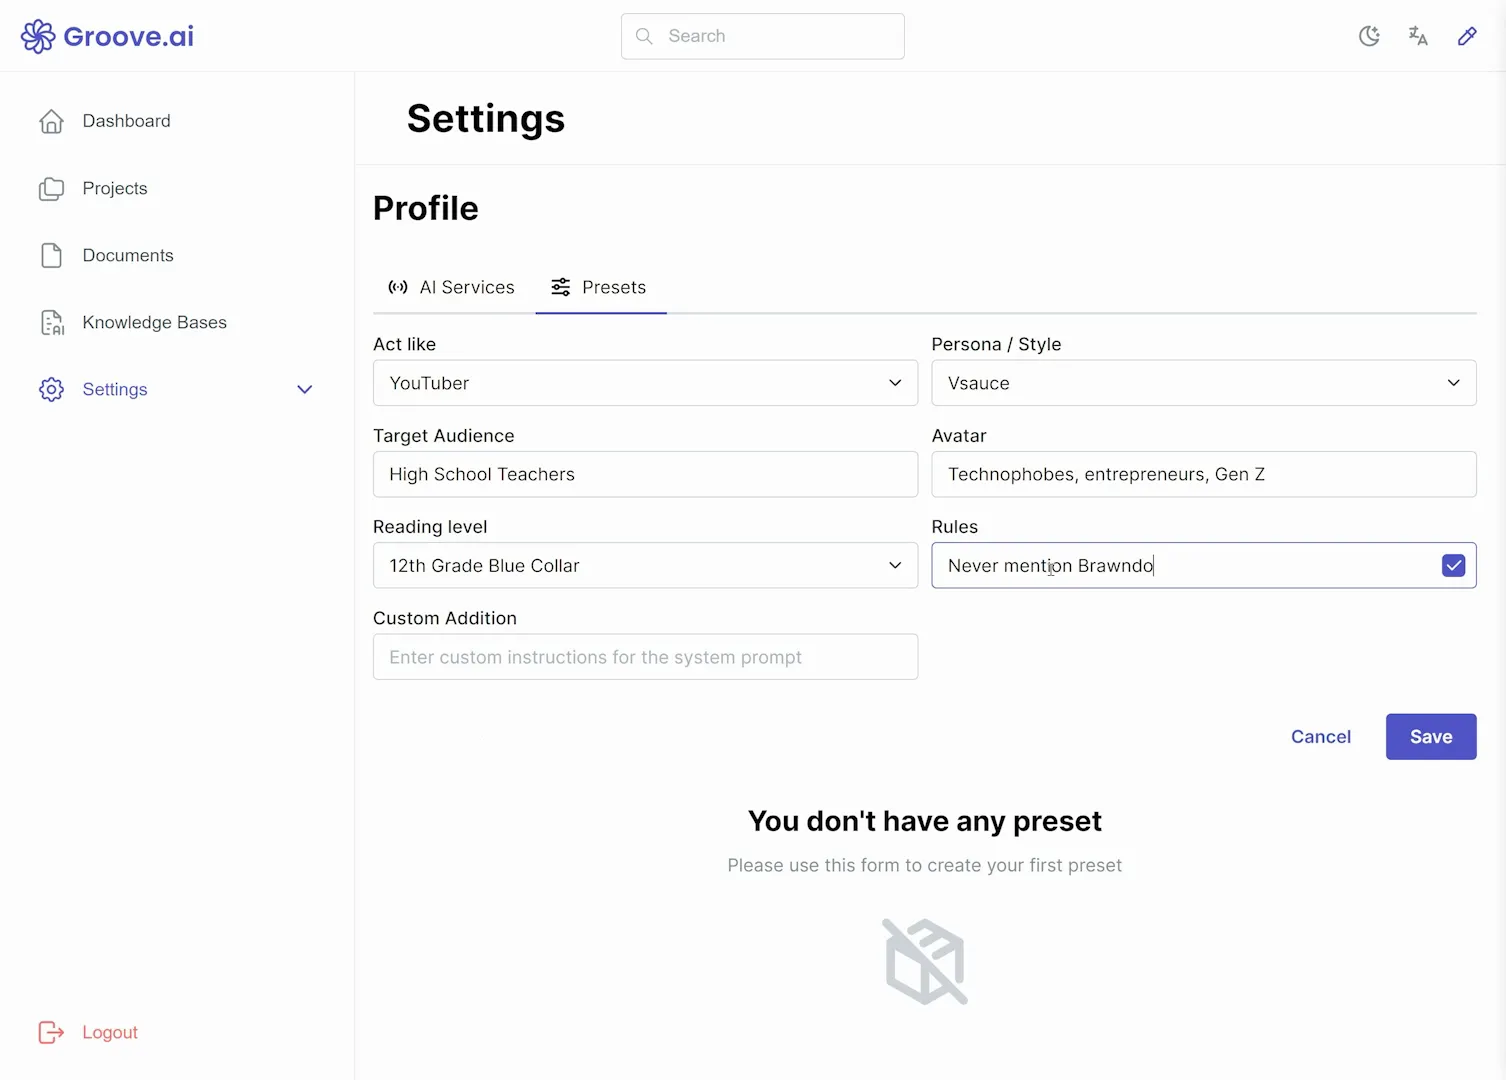
The Act Like dropdown menu presents a number of writing professions and genres. Once you choose a type of writing, the second dropdown (Persona/Style) will have a number of authors you can choose from.
Next is the Target Audience which is who you are marketing to. This field should be something broad and simple. For example, "Digital Marketers" or "High School Teachers". You'll want to get more specific in the Avatar field, by specifying subsets of your audience (e.g. technophobes, entrepreneurs, gen z, gen x).
Choose a reading level for your text output and then set some rules. Your rules can be anything you want to ensure in your text style such as "Never mention this other product".
Finally, you can add Custom Additions of any sort not covered in the previous fields. If you have any specifications, you can simply type them in using plain English. When you are done with all the fields, click Save.
When creating a project, you will be able to not only select your Preset, but customize it even further to what you may need in the moment.

